Online:The Dragonguard
| This page is currently being rewritten as part of the Online Quest Project. The page is being both written and checked. All users are welcome to make changes to the page. If you make a change that is relevant to the project, please update this template accordingly, and make sure you have observed the project guidelines. Detail Quick Summary: written by MolagBallet, not checked
Quest Stages: written by MolagBallet, not checked |
|
Quick Walkthrough[edit]
- Investigate the West Sentry Tower.
- Enter Doomstone Keep and find Nahfahlaar.
- Empower the Mask of Alkosh
- Use the empowered Mask of Alkosh against the New Moon cultists.
- Kill Laatvulon.
- Return to the Dragonguard Sanctum and speak with Nahfahlaar.
Detailed Walkthrough[edit]
With the Mask of Alkosh in your possession, it's time to take the fight to Laatvulon, but you need to find Nahfahlaar. General Renmus arrives in the Sanctum, having been convinced to aid the Dragonguard by Aeliah. Nahfahlaar and Laatvulon have been seen fighting by people all over Elsweyr. The general suggests you go to a watch tower near between Black Heights and the Tenmar Forest. A group of soldiers was sent there, and they might have some insight into Nahfahlaar's location.
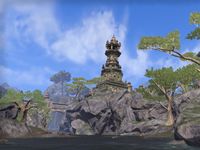
Head along the road east from the Black Heights Wayshrine. When the road curves, keep walking east. You'll reach the sentry tower from there. You will arrive to the sight of a dead Dragon surrounded by several Shields of Senchal and Dragonguard Soldiers. Caska is among them. Speak with her. She says that Nahfahlaar was surrounded by at least five other Dragons when the Dragonguard arrived. Za'ji shot one of them down with a ballista, and the troops fell upon the beast, killing it. She's not sure where Nahfahlaar went, but Za'ji is still up in the watchtower, so he has a vantage point. Climb the tower and speak with Za'ji.
Za'ji confirms what Caska said. At the end of the conversation, Nahfahlaar and his pursuers come back around and fly right past you. They're heading northeast, towards Doomstone Keep. You should pursue them. Doomstone Keep is in the far northeast corner of the map. Follow the road east to the Forsaken Citadel. When you reach the citadel, keep going along the road and cross the bridge. Keep following the road north and you'll find Doomstone Keep. You'll reach the keep just in time to see the tail end of Nahfahlaar and Laatvulon's conflict. Nahfahlaar gets shot down by Laatvulon, and falls into the keep. Enter Doomstone Keep and try to find a way to reach Nahfahlaar. You are joined by Aeliah, the General and Sai Sahan, the latter of whom follows you into the keep in pursuit of your Dragon ally. Take the path on the right and you'll find the entrance to Doomstone Caverns. If Nahfahlaar fell further, he's definitely fallen down here. These suspicions are confirmed when you spot Nahfahlaar across a great chasm, clearly wounded.
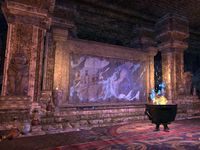
The path ahead is fairly linear. Fight your way through Laatvulon's frozen undead minions. A short way into the caverns, you'll come across a tablet. Reading it reveals that the Mask of Alkosh can be used to light sacred fires and reveal the story of the Dragonguard's battle with the Black Beast. Find the first brazier and light it. Sai Sahan studies the tapestry by the brazier and regales you with his interpretation of the tale of the Black Beast's fall. There are four braziers in total, so you're going to need to light the other three as you find them. Like the first flame, each brazier has a tapestry behind it. Continue forward, fighting frozen skeletons along the way.
The Black Beast terrorized Elsweyr, bringing frozen fury upon the Khajiit. A hero bearing the Mask of Alkosh petitioned Nahfahlaar for aid, but he refused. The hero, who Sai recognizes as Ja'darri, lead the Pride of Alkosh and the Dragonguard against Laatvulon. They were able to seal him away at the cost of Ja'darri's life. Sai isn't sure how the Mask of Alkosh was used against Laatvulon, but he suspects Nahfahlaar may have answers. Enter the Sealing Chamber and speak with Nahfahlaar. Nahfahlaar reveals that the Mask of Alkosh requires to wills to empower it: one of the hero who bears it, and the blessing of a Dragon. All Dragons seek power, but the will of Alkosh can suppress them. He refused to empower the mask all those years ago, which is why Laatvulon was imprisoned here in Doomstone Caverns instead of being killed. Here, he agrees to empower the mask and keep history from repeating itself. Hold the mask up to Nahfahlaar.
When the mask is raised, your vision goes white, and you find yourself in a realm filled with dunes of white sand. Nahfahlaar explains that what you're seeing is a trick being played on your eyes by the mask; this place isn't actually real. Nahfahlaar beckons you to explore the wastes. When you cross the dunes and you'll find a bright oasis made of gold and filled with the clearest, purest water. The spirit of Ja'darri is there, and she confirms what you've been told about the Mask of Alkosh. You need to hold the mask up to Nahfahlaar to empower it. Nahfahlaar speaks aloud, giving confirmation of his approval. He finds you a worthy champion of Alkosh. When you put on the mask, you are transported back to reality.
Exit the caverns. It's time to take the fight to Laatvulon. Nahfahlaar is fully invigorated by the experience of empowering the mask, as if his wounds no longer matter. Laatvulon is being empowered by his minions below. While wearing the Mask of Alkosh, the Might of the Dragon King grants you incredible resistances, health regeneration, and attack power. You will essentially one-shot Laatvulon's minions. Fight through waves of New Moon cultists as you travel through Doomstone Keep. Below, Riftbringer Dorzarra is preparing a ritual. You can call upon Nahfahlaar's strength during the fight to allow him to destroy a few rounds of cultists. Defeat Dorzarra and her reinforcements, then press on. Laatvulon is waiting in the clearing, and the battle begins.
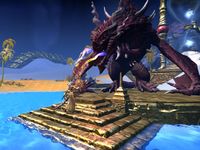
Initially, Nahfahlaar and Laatvulon will duke it out while Laatvulon raises a group of undead minions. Eventually, Laatvulon freezes Nahfahlaar in place and comes down to face you. You'll want to heal or ward through Laatvulon's frost breath. Block when he channels unrelenting force. Every 25% of his health, he flies back up to his perch to face Nahfahlaar, sending waves of the frozen undead to contend with you. Every time this happens, more members of the Dragonguard join you in the battle. When the undead minions stop arriving, Laatvulon comes back down to fight you face to face. Without the power of the mask, you'd be unable to resist the strength of Laatvulon's magic and physical attack power, and the fight would be a lot slower and harder. Kill Laatvulon and listen to Sai's speech to the surviving members of the Dragonguard. Return to the Dragonguard Sanctum, speak with your companions and return to Nahfahlaar in his Chamber to be rewarded for your success against the Black Beast.
Notes[edit]
- The Mask of Alkosh acts the same as the Amulet Of Kings: Makes you nigh invincible, massive health regen and hit like a tank able to one-shot normal enemies, take down elites easily, and, go toe-to-toe with the boss.
Bugs[edit]
Quest Stages[edit]
| The Dragonguard | |
|---|---|
| Finishes Quest | Journal Entry |
| With our final fight ahead of us, we need all the help we can get. I should see if General Renmus has received any reports about Nahfahlaar.
Objective: Talk to General Renmus | |
| I need to go to the sentry tower northeast of Senchal to check in with General Renmus's soldiers. They might have seen Nahfahlaar and Laatvulon.
Objective: Go to the Sentry Tower | |
| I found the west sentry tower surrounded by the Shields of Senchal and Dragonguard. They're celebrating over a Dragon corpse. Looks like Caska arrived ahead of me. I should speak to her.
Objective: Talk to Caska | |
| Caska isn't sure where Nahfahlaar headed next, but thinks that Za'ji up atop the tower may have a better view. I should speak to him.
Objective: Talk to Za'ji | |
| Nahfahlaar headed north with Laatvulon and several other Dragons in tow. I should follow after them.
Objective: Follow Nahfahlaar | |
| Nahfahlaar was felled by Laatvulon as we arrived at the gates of Doomstone Keep. I should speak with Sai Sahan.
Objective: Talk to Sai Sahan | |
| Nahfahlaar fell farther in Doomstone Keep. I should search for him.
Objective: Find a Way Into Doomstone Keep | |
| I found caverns under Doomstone Keep. If Nahfahlaar did fall, it's likely he ended up there. I should search for him.
Objective: Search the Caverns
Hidden Objective: Find Nahfahlaar | |
| Sai Sahan and I found a tablet inside the caverns. I should read it.
Objective: Read the Tablet | |
| I read the tablet. I should speak to Sai Sahan about its contents.
Objective: Talk to Sai Sahan | |
| The tablet's contents suggests that the mask can be used to light sacred fires and reveal the story of the Dragonguard's battle with the Black Beast. I should find the first flame
Objective: Light the First Flame
Hidden Objective: Find the First Flame | |
| We discovered an ancient tapestry near the first flame. I should look for other fires to light and more tapestries to see what they reveal.
Objective: Light the Fires: 0/3
Hidden Objective: Find the Second Mural
Hidden Objective: Find the Third Mural
Hidden Objective: Find the Fourth Mural | |
| Now that we examined a number of tapestries, I should talk to Sai Sahan.
Objective: Talk to Sai Sahan | |
| The tapestries told the story of Ja'darri and the Dragonguard battling Laatvulon. They weren't able to kill him, but sealed him beneath Doomstone Keep instead. Obviously, he eventually found a way out. I should go inside and see what I can find.
Objective: Enter the Sealing Chamber | |
| I found Nahfahlaar, wounded in the sealing chamber. I need to talk to him about what I learned from the tapestries.
Objective: Talk to Nahfahlaar | |
| Nahfahlaar agreed to help me awaken the power of the mask. I only need to raise it before him.
Objective: Raise the Mask | |
| I was transported alongside Nahfahlaar to a strange place. Nahfahlaar says it's a trick of the mask. I should explore this realm of Spilled Sand and see what I can discover.
Objective: Explore the Spilled Sand | |
| I found the spirit of Ja'darri waiting for me in an oasis within the endless dunes. I should talk to her.
Objective: Talk to Ja'darri | |
| Ja'darri confirmred [sic] that a Dragon must awaken the dormant power that lies within the Mask of Alkosh. I need to begin the ritual to unlock its power.
Objective: Awaken the Mask of Alkosh
Hidden Objective: Interact with Mask | |
| With the Mask of Alkosh empowered, I should return to the surface and take the fight to Laatvulon.
Objective: Return to the Surface | |
| The time has finally come to face Laatvulon. I should meet up with Nahfahlaar before we search for the evil Dragon.
Objective: Find Nahfahlaar
Hidden Objective: Noticed Laat | |
| The Order of the New Moon has risen to protect their Dragon god. I need to defeat them before reaching Laatvulon
Objective: Defeat the Cultists | |
| More cultists pour into Doomstone Keep. With the power of the mask, I should be able to easily put them down.
Objective: Defeat the Cult Reinforcements | |
| With the minions of Laatvulon falling away, the time has come to engage Laatvulon. I should find him.
Objective: Reach Laatvulon | |
| With the power of the Mask of Alkosh and the aid of my companions, I'm now ready to face Laatvulon and destroy him once and for all.
Objective: Kill Laatvulon | |
| With Laatvulon defeated and Elsweyr safe from his vile schemes, the time has come to return the Dragonguard Sanctum
Objective: Return to Dragonguard Sanctum | |
| I should speak to Sai Sahan about all that has happened. I can also speak to my companions and see how they fare
Objective: Talk to Sai Sahan | |
| I should speak to Nahfahlaar about the connection we share. I can find him in his chamber in the Dragonguard Sanctum
Objective: Talk to Nahfahlaar | |
| I should speak to Nahfahlaar and find out what the Dragon plans to do next.
Objective: Talk to Nahfahlaar | |
<Alias=LocationHold>) is dynamically set by the game and will be filled in with the appropriate word(s) when seen in game.
- Not all Journal Entries may appear in your journal; which entries appear and which entries do not depends on the manner in which the quest is done.
- Stages are not always in order of progress. This is usually the case with quests that have multiple possible outcomes or quests where certain tasks may be done in any order. Some stages may therefore repeat objectives seen in other stages.


