Project Tamriel:Cyrodiil/Garlas Agea
| This article requires a map. Please remove this template from the page when finished. |
|
||
|---|---|---|
| Added by | Project Cyrodiil | |
| # of Zones | 6 | |
| Divine Intervention | Fort Heath | |
| Occupants | ||
| Ayleid creatures, Imperial Archaeological Society members | ||
| Console Location Code(s) | ||
| "Garlas Agea"; "Garlas Agea, Aransel"; "Garlas Agea, Cita"; "Garlas Agea, Dorahame"; "Garlas Agea, Malatu Mallari"; "Garlas Agea, Nagaseli"; "Garlas Agea, Nedic Stand" | ||
| Region | ||
| Strident Coast, [-113,-51] | ||
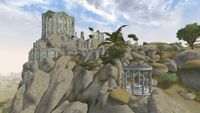
Garlas Agea is a large Ayleid tower that looms over the Strident Coast.
It stands to the northeast of Fort Heath and southeast of Brina Cross.
Cita[edit]
The Cita area comprises of a deep vertical shaft, at the bottom of which is an Imperial Archaeological Society expedition led by the High Elf, Bucynarel. A series of locked doors exist in this shaft that Bucynarel seeks to have opened by acquiring their keystones. She will task you with retrieving such keystones (and the ruin's Varla Stone) from the unlocked Nagaseli portion of the ruin.
As the ruin has been relatively untouched by adventurers (or at least has successfully murdered them before they could do much touching), treasures abound here. Normal progression through the ruin ties into the related quest given by Bucynarel, as it is she who can give you the keystone to the first area - Nagaseli.
Nagaseli[edit]
This section is a winding corridor with multiple burial niches. One of these niches holds a Daedric Battle Axe - look for a dead end where an Ayleid Chest and Ayleid Reliquary stand on the floor together, and check the niche above.
The winding corridor ultimately opens up into a large room that comprises the northern half of the area. A metal cover suspended from the ceiling in the centre conceals the Varla Stone of Mental Exegesis - this cover can be raised by pressing a button to the cover's west. The Dorahame Keystone lies in a coffin beneath the Varla Stone. Axe enthusiasts may enjoy the Ayleid War Axe in the same coffin. An open coffin at the room's western end holds an individual wearing Saliache Greaves, while another on the same lower floor contains a skeleton wearing a Saliache Left Bracer.
Dorahame[edit]
Accessible with the Dorahame Keystone, this area is fairly heavily trapped with swinging blades and poison gas. An Ayleid Curved Long Blade and the Dorahame Second Keystone lie on an altar in the easternmost chamber. This latter keystone unlocks the level 80 locked metal door in the section's south, opening the way to Nedic Stand.
Nedic Stand[edit]
Ayleid architecture gives way to a partially flooded cavern containing skeletons from a long-ago fight. Ayleid armor and weaponry is present here, including boots, a left pauldron, a helm, longbow, curved short blade and war axe. A long and winding tunnel reaching south has a cave in at the very end. You'll find a skeleton buried in rocks here, clutching the Malatu Mallari Keystone in its hand.
Malatu Mallari[edit]
This section is accessible using the Malatu Mallari Keystone, and contains the library of the old Ayleid ruler, Racha. It is accordingly filled with magical scrolls.
Levitation can be profitable in this section, for on a top shelf of the southern room, you'll find a Saliache Cuirass, while a Daedric Helm lies concealed behind scroll cases in the topmost niche of a dead end (specifically, the dead end you would come to if you left the southern room by its leftmost exit, and took the first left. Another pair of Saliache Greaves sit on a shelf just before the stairs down to the northeastern circular chamber. You'll find a skeleton and their Ayleid Scholar's Notebook in this chamber. This reveals the incantation necessary to open the door to the Aransel section, which is otherwise magically locked.
Aransel[edit]
Although technically accessible without keystones, unless entered from the Malatu Mallari section, you'll not be able to get into this area's main chamber - the throne room of an Ayleid Sorceror King named Racha, Lord of Ugly Obscurity.
One notable treasure here is the unique Scroll of Polychrome Refraction - a reusable item that summons the Auroran, Nacarat, as a follower. This sits on the arm of Racha's throne. The other major treasure is a Daedric Buckler, which lies behind said throne.
Outside of the throne room, you can follow a corridor to the east. A button at the end of this corridor opens a secret door permitting easy access to the Cita section.
Related Quests[edit]
Miscellaneous[edit]
- Into Ugly Obscurity: Delve into an Ayleid stronghold, and unlock terrible secrets...
Notes[edit]
- On completion of Into Ugly Obscurity, IAS members will move further into the ruin, with Kalana Monilian and Otto appearing in the Nedic Stand, and Bucynarel and Rilus Quax appearing in Malatu Mallari.
- Once moved to Malatu Mallari, Rilus will (with 80+ disposition) confess to hearing the voice of what he describes as an inky black spot with tentacles that wishes him to read the secrets in Racha's scroll - a possible protrusion of Hermaeus Mora.
- Garlas Agea also appeared in Oblivion.
People[edit]
| Name | Race | Class | Faction | Level | Health | Magicka | Alarm | Fight | Location | |
|---|---|---|---|---|---|---|---|---|---|---|
| Bucynarel | High Elf | Savant | Imperial Archaeological Society (Senior Excavator) | 17 | 109 | 180 | 100 | 30 | Cita | |
| Kalana Monilian | Imperial | Acrobat | Imperial Archaeological Society (Digger) | 4 | 64 | 84 | 0 | 30 | Cita | |
| Otto | Redguard | Miner | Imperial Archaeological Society (Digger) | 2 | 68 | 62 | 100 | 30 | Cita | |
| Rilus Quax | Imperial | Scribe | Imperial Archaeological Society (Assistant) | 6 | 75 | 122 | 100 | 30 | Cita |
