Skyrim:Unbound
| Escape Imperial custody and a dragon attack. |
| Quest Giver: | Ralof | ||
|---|---|---|---|
| Location(s): | Helgen, Helgen Keep | ||
| Reward: | Access to Skyrim, Various low level items, Spell Tome: Sparks |
||
| ID: | MQ101 | ||
|
|||
|
|||
Quick Walkthrough[edit]
- Create your character.
- Make your way to Helgen Keep to escape the dragon attack.
- Choose to enter Helgen Keep with either Ralof or Hadvar.
- Loot containers and bodies for weapons, armor, and basic equipment.
- Escape from Helgen.
Detailed Walkthrough[edit]
Awakening[edit]
You begin the game to find yourself bound at the wrists and under Imperial guard custody in a prisoner caravan. In the carriage with you is Ralof (a Stormcloak soldier), Lokir (a horse thief), and Ulfric Stormcloak (leader of the Stormcloak rebellion and Jarl of Windhelm). Ralof sits across from you, with Lokir next to him and Ulfric to your right.
As revealed by Ralof, you are all prisoners of the Empire, who had set an ambush for the Stormcloaks near Darkwater Crossing. You and Lokir were caught up in the same action, though at the time you had been crossing the border, and Lokir had stolen a horse. Despite this, you and Lokir were arrested as potential Stormcloak sympathizers and are now being sent to Helgen for execution.
The carriage soon reaches Helgen, a town in Falkreath Hold not far from the southern border of Skyrim. At the time of your arrival, Falkreath's Jarl is loyal to the Empire, and the hold is controlled by the Imperial Legion, though the Stormcloaks have a some presence in the area, hiding in a camp within the Hold.
As you enter Helgen, Ralof will make a comment about General Tullius, who is on horseback by an Imperial captain, facing First Emissary Elenwen and a few other Thalmor members.
The carriage will ride through the village and draw to a stop in the central area of the town. The Imperial captain orders you and the other prisoners off the carts, then instructs you to proceed to the execution block as your name is called. Hadvar, an Imperial soldier, will first call Ulfric Stormcloak, and then Ralof. When Lokir is called, he will attempt to flee, but will always fail, since the Imperial captain will have him shot by an archer. After this, Hadvar will then demand you to step forward.
Who Are You?[edit]
When Hadvar asks for your identity, you'll need to take a moment to decide.
|
Once you've created and named your character, Hadvar will make a comment based on your race.
| Race | Dialogue |
|---|---|
| Altmer | You're not with the Thalmor Embassy, are you high elf? No, that can't be right... |
| I'm sorry. We'll make sure your remains are returned to Summerset Isle. | |
| Argonian | Are you a relative of one of the Riften dock workers, Argonian? |
| I'm sorry. We'll make sure your remains are returned to Black Marsh. | |
| Bosmer | Not many wood elves would choose to come alone to Skyrim. |
| I'm sorry. We'll make sure your remains are returned to Valenwood. | |
| Breton | You from Daggerfall, Breton? Fleeing from some court intrigue? |
| I'm sorry. We'll make sure your remains are returned to High Rock. | |
| Dunmer | Another refugee? Gods really have abandoned your people, dark elf. |
| I'm sorry. We'll make sure your remains are returned to Morrowind. | |
| Imperial | You're a long way from the Imperial City. What're you doing in Skyrim? |
| I'm sorry. We'll make sure your remains are returned to Cyrodiil. | |
| Khajiit | You with one of the trade caravans, Khajiit? Your kind always seems to find trouble. |
| I'm sorry. We'll make sure your remains are returned to Elsweyr. | |
| Nord | You picked a bad time to come home to Skyrim, kinsman. |
| I'm sorry. At least you'll die here, in your homeland. | |
| Orc | You from one of the strongholds, Orc? How did you end up here? |
| I'm sorry. We'll make sure your remains are returned to Orsinium. | |
| Redguard | What're you doing here, Redguard? You a sellsword? A sailor from Stros M'kai? |
| I'm sorry. We'll make sure your remains are returned to Hammerfell. |
Keep Your Head[edit]
The captain will order your death even though your name is not on the list. You will be forced to follow her to the executioner's block and after a brief confrontation between General Tullius and Ulfric Stormcloak a distant noise will echo across the sky.
The general will dismiss it as nothing and order that the executions begin, and a priestess of Arkay will begin to administer the last rites to the condemned. A Stormcloak soldier will interrupt her and is promptly executed, and the captain will then order you to step up to the block. An ominous sound will again echo through the mountains, this time louder. Most of the assembly will be briefly distracted, but the captain will not be put off by this. You will be ordered to the block and forced into position, ready to be executed. From that perspective, you should have a view of the headsman and the tower behind him. As the headsman raises his axe, a dragon known as Alduin flies into the scene.
Return of the World-Eater[edit]
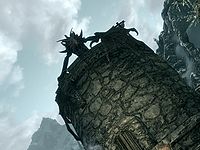
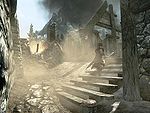
The dragon will descend onto the nearby tower with a crash and proceed to use a special shout that turns the sky red and sends flaming meteors crashing down, which eventually damages the city beyond repair, knocking the headsman to the ground.
The second shout he uses, Unrelenting Force, will stagger you. However, Ralof will urge you to your feet to escape, reasoning that the gods may not provide another chance. When you are able to stand, you'll be able to move about freely, and the quest will appear in your journal.
Make Your Way to the Keep[edit]
If you are able to get your bearings soon enough, you can follow right behind Ralof. If it takes you a little time, Ralof will go into a tall tower to the south-southwest and call to you: "In here. This way! Come on!" Follow him into the tower as fireballs rain down from the sky and boulders fly off in all directions from the explosions. Despite the apparent danger, you will have no trouble getting into the tower unless you loiter in unsheltered areas for an extended time.
Enter the building far enough so that the door can close behind you. Inside, you'll see some injured Stormcloaks and another tending to them. Stepping onto the carpet in the middle of the small room and turning back around toward the door will position you to observe a conversation between Ralof and Ulfric. At this point you cannot pick-up or interact with items with your hands, as they are bound. No one cuts your bonds.
Both Ralof and Ulfric will urge you to hurry up through the tower. Follow Ralof up the staircase. When a Stormcloak soldier up ahead tells you that some fallen masonry needs to be moved out of the way, the wall to your right (southeast) will be blown in by Alduin. He will then attack through the hole with a Fire Breath shout. Though you cannot perceive it as such, Alduin will shout "Toor... Shul!" meaning "Inferno... Sun" in the dragon language. This shout will knock Ralof off the stairs, but he will climb back up to you. The gods may indeed be providing you some extra protection, at least for now—you will not be hurt by the shout, even if you don't heed Ralof's warning to step back. Eventually, however, once you venture outside of Helgen, encounters with dragons will prove much more dangerous.
After Alduin flies off, Ralof will urge you to jump out the hole just created and down into a partially destroyed inn below, telling you that they will follow as soon as they can and meet you on the other side. Your target landing spot will be indicated by your objective marker. Move to the ledge and jump while continuing to move forward.
On landing, you may hear yourself grunt in pain, but you will only take minor damage. Travel eastward through the inn and drop down through the hole in the floor. Your objective marker will indicate the next waypoint. Follow Hadvar, the Imperial soldier you just saw near the execution block. He will be outside the door from the inn, and to your left (northeast), trying to help some citizens.
Hadvar will be trying to coax a young boy, Haming, away from an open area where his father, Torolf, lies injured in the road. As the boy returns toward Hadvar, Alduin will land to the northeast and send a Fire Breath shout toward Hadvar and the boy, killing Torolf. Hadvar will take Haming to safety back near the inn with another man, Gunnar Stone-Eye, and leave the boy in his care. When he sees you, Hadvar will address you as "prisoner" and tell you to follow him if you want to stay alive.
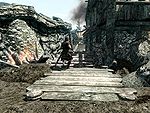
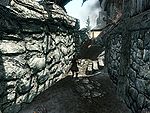
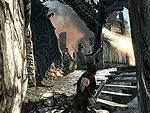
Follow Hadvar as he proceeds northeasterly across the area where Alduin just killed Torolf. Hadvar's purpose at this point is to "Find General Tullius and join the defense" of Helgen. Passing between a building and a stone wall, Hadvar will stop and advise you to stay near the wall. Alduin will then land on top of the wall and direct a Fire Breath shout at a Legionnaire ahead of you and to the right, around the corner.
Once Alduin takes flight again, follow Hadvar up the steps and then to the left (northward) through the gap in the wall. Inside the ruined building, jog to the left, then turn right (eastward). You will exit into an open area where a number of Imperial mages, soldiers, and General Tullius will be counter-attacking Alduin with arrows and fireballs.
When Hadvar approaches General Tullius, the general will order him into the Keep, announcing a retreat. Telling you to stay close to him, Hadvar will head north, then turn left towards the entrance to the Keep.
- Note: Hadvar should be taken seriously when he tells you to stay close to him. If you tag fairly close behind him at this point, Alduin will not harm you. If you choose to lag behind or explore the area, however, you will do so at your own considerable risk. Eventually, Alduin's shouts may hit you between this point and entering the Keep. He can use the Fire Breath shout and the less serious Unrelenting Force shout. If you are hit with the former, it may or may not kill you. The latter will violently shove you or may send you flying for a short distance. Once you reach the exterior of the Keep, if you remain outside for an extended period, Alduin may land and attack with a shout at close quarters or physically with his jaws, an attack that will be fatal.
After running under an archway, Hadvar will encounter Ralof just outside the Keep. The two enemies will draw their weapons and prepare to fight before realizing that getting into the Keep and away from the dragon is a higher priority.
As Hadvar and Ralof rush to two different but nearby entrances to the Keep, both calling to you to follow them, your journal will update to show the objective of making your way to the Keep as completed, and the next objective will appear, presenting you with a choice.
Unsafe Haven[edit]
- Note: After entering the Keep, depending on whether you chose to enter with Hadvar or Ralof, the part of the interior map which you emerge in and the initial events that occur will differ slightly.
|
If you choose to go with Ralof, you will discover the body of a dead Stormcloak, Gunjar, in a circular room immediately after entering the keep. After freeing you from your bindings, Ralof will instruct you to recover the gear on Gunjar's body for your own use. While you equip yourself, Ralof will examine the doors. He will discover one door is locked, and the other can't be opened from the side you're on. Luckily, the captain and an Imperial soldier will come through and open the door secured from the other side. Once they open the door, you will be forced to kill them to recover the key to the other gate from their bodies. Don't forget to loot the barracks they came from. |
If you choose to go with Hadvar, you will enter the keep to find yourself in the barracks room where Hadvar will cut your bonds and instruct you to loot the room for some equipment. Once you have acquired some gear from the marked chest, he will open a gate and you will follow him down a path to the circular room containing Gunjar's body. Here you will face two hostile Stormcloaks. Once they are defeated, follow Hadvar onward through the opposite door. |
- From here onward, the physical path taken by both Hadvar and Ralof is identical. Only the type of enemies and the accompanying dialogue is different: for Hadvar's path you face Stormcloaks, while for Ralof's path you face Imperial soldiers.
Going through the door onto the now opened-up path, the dragon's activities above will cause the ceiling to fall, forcing you to divert through a door on your left, where you will discover a storeroom with two Imperial soldiers/Stormcloaks gathering supplies. After defeating the enemies, Hadvar or Ralof will advise you to go through the barrels for any valuables they may contain.
Continuing down, you will arrive at an interrogation room, where a battle between an Imperial torturer, his assistant, and some Stormcloak soldiers is taking place, prompting you to fight with whichever enemies your escort is not aligned with. If you are with Hadvar, he has a conversation with the torturer, trying to convince him to come; his attempts prove futile, however, as only the assistant torturer follows. If you're with Ralof, he has a quick conversation with the surviving Stormcloaks, who will both choose to join your party. Hadvar/Ralof will then point to a cage with a dead mage and several valuables inside it (including mage robes, and hood and a Sparks spell tome), offering you several lockpicks, and suggesting you pick the lock to get to the items. If you are not near Hadvar/Ralof when he offers you the picks, you will not get them, but there are a couple of picks in the room in the corner that also contains an iron shield and iron mace, as well as four picks inside a knapsack laying on a small table near the cells. The table also holds a copy of The Book of the Dragonborn. There are two empty, locked cells on either side of the dead mage, and two other locked cells down the hall (this is a safe chance to practice the lockpicking skill, as well as learning the game mechanic).
Continue down the corridor past some prison cells which can be unlocked for some minor loot, and through another prison room, and you will eventually enter a natural cave, filled with either Imperial soldiers guarding it for General Tullius, or some lost Stormcloaks. There is an oil spill that can be set alight to damage the enemies on the upper level using the Flames spell.
After killing them, you will find a raised drawbridge obstructing your path. A nearby lever can be used to lower the bridge, which will subsequently be destroyed by falling rubble shortly after you cross it. Continuing on, you will come to a skeleton near the passage leading towards another large cavern inhabited by several frostbite spiders. Near the skeleton is an iron dagger, a potion of minor healing, and a coin purse. Once you defeat the spiders, head through a passage leading deeper into the caverns. In the next chamber, near an underground stream, you will encounter a resting bear. Ralof/Hadvar will advise you to sneak past it, but he will give you a bow and some arrows in case you choose to ambush it. Fighting the bear is not too difficult with Hadvar/Ralof helping you. Afterwards, follow Hadvar/Ralof and exit the cave through a crevice in the rock. Leaving the dungeon, you'll see Alduin flying off into the distance, towards the north, completing the quest.
Achievements[edit]
One achievement is unlocked when you complete this quest:
Notes[edit]
- For all intents and purposes, choosing to side with Hadvar or Ralof doesn't matter, as you aren't locked out of any quest chain. The only difference between the two paths is the type of loot and enemies inside the keep, and the rewards given for helping them escape (given during the next quest). At the end, you will still have the option of choosing to side with the Empire or the Stormcloaks.
- Both Hadvar and Ralof are essential NPCs at this point, so they cannot die, and will never turn hostile (unless you're an Altmer and cast Fury on them) until the quest is finished. This can be exploited to level up your attack skills (destruction, one-handed, two-handed, and archery) and sneak skill early in the game. You won't be able to pickpocket them, though.
- The game always starts with a calendar date of the 17th of Last Seed, making this quest the only one in the game with a fixed date. The day of the week can vary, though:
- If you had a game loaded immediately before starting your new game, the day of the week will be whatever it was before you exited back to the main menu.
- If you did not have a game loaded, the day of the week will be Sundas.
- You will always know the spells Flames and Healing by the time you start the quest, regardless of your race, and depending on your race, other spells will also be known:
- Altmer will also know Fury.
- Bretons will also know Conjure Familiar.
- Dunmer will also know Sparks.
- You may wish to see the main page for Skyrim for information such as using controls and our guide for first-time players.
- If you wait around in any one area for too long, Alduin will begin specifically targeting you.
- It is possible to save Torolf and the Legionnaire. When the dragon lands in front of Torolf and you are quick enough you can run past Alduin and he will fly off, not harming him. With the Legionnaire you have to be quick enough as well. If you get to him before Alduin lands on the wall, you can sprint into him, knock him into the building and Alduin's fire breath shout will miss. Be careful to stay in front of him though, as there is a chance he will run back to his spot, running into the fire shout.
- You can kill the Imperial Torturer and his assistant with no consequence, even if you are following Hadvar.
- This is the only quest in the game where an Imperial Legion mage can be seen; originally they were meant to also appear in the Civil War as troops, but didn't make it to the final version.
- Even if you kill the bear with a sneak attack, Hadvar/Ralof will say "Not the sneaking type, eh?" or "Sneaking is highly overrated, eh?"
- If you enter the Keep with Hadvar, the on-screen tutorial message will say "Press activate to open containers." If you enter with Ralof, it will say "Press activate to loot bodies" instead.
Bugs[edit]
| To meet our site's higher standard of quality, this article or section may require cleanup. The user who placed this here had the following concern: lots of very unlikely bugs here; needs removal of the most ridiculous ones, testing of the believable ones To leave a message about the cleanup for this article, please add it to this article's talk page. |
- You might encounter bugs in the quest script where the game will stop progressing. These errors may occur even after a game restart, and possible fixes are a complete re-installation of the game or installing DXSETUP.exe from skyrim\DirectX10. There are several versions of the bug:
- You may start outside the cart with other prisoners, unable to do anything. This can be fixed by restarting the game.
- The cart of prisoners in front of you may clip, unexpectedly turn, flip on its side, or strike the city gate. This will sometimes cause the same to happen to your cart. On PS3, this can be caused by holding the PS button and any other button.
- The headsman may not carry out the first Stormcloak execution as scripted, which stops the script for your execution as well. This can be fixed by opening the console and typing
prid 000654edfollowed bykill. Alternatively, the guards and executioner may successfully execute the Stormcloak, but will do nothing to lead you to the block. - The Stormcloak execution may be successful as scripted, but the Stormcloak may go through the animation without being connected to his dying body and aggress against the other NPCs while dead. This results in a headless Stormcloak fighting and dying twice, and your execution delayed.
- When you are at the chopping block awaiting your execution, Alduin may not land on the tower, instead flying around in circles overhead, making the game unable to progress.
- After you follow Ralof up the stairs in the keep, Alduin may not blast a hole in the wall of the tower, preventing you from jumping through it to the inn.
- Hadvar may start much further away from the prisoner convoy than he's intended to be, or get waylaid by local wildlife and dismount to fight it off and not follow afterwards. As a consequence, he will be locked out of Helgen once the gate closes behind the convoy, and will not be present for the proceeding scene. Luckily the quest will proceed as usual, albeit without Hadvar to read off the lists or give commentary (the game will simply skip his dialogues in his absence), and on top of this Hadvar will reappear in his proper place after you exit the inn during Alduin's attack.
- If you follow Hadvar/Ralof into the Keep, when you escape Helgen later, rather than going with you to Riverwood, he may deviate towards Embershard Mine instead of the Guardian Stones, and not move. This will also cause Sven and Hilde's dialogue to never play.
- Talk to him as you get to the corner above the stones, he will reply then turn around and run to the stones.
- When you enter Helgen Keep with Ralof, if you choose to go in with him, you may appear to jog in place, having no control over anything except for the menu and console command keys.
This can be fixed by waiting until Ralof asks you to go there, so he can take your bindings off, then using the console command
player.moveto 0002bf9e. This will teleport you to him, at which point he unbinds you and you regain all control.The same bug can rarely happen with Hadvar, and is fixed similarly, except Hadvar's code is
0002bfa2.An alternate fix is to access the console and disable/re-enable player controls with 'enableplayercontrols'. This should 'reset' the player and restore movement.
- Your stats may say you carried 140 gold before the quest. ?
- Gunjar's corpse doesn't despawn with everyone else's.
-
The Unofficial Skyrim Patch, version 1.2.7, fixes this bug.
-
Quest Stages[edit]
| Unbound (MQ101) | ||
|---|---|---|
| Stage | Finishes Quest | Journal Entry |
| 150 | I have been captured by the Empire and sentenced to death alongside the Stormcloak rebels. We were taken to Helgen, but before I could be executed a dragon appeared and attacked the town. I need to find some way to escape. | |
| 160 | Objective 30: Make your way to the Keep
Objective 50: Enter the Keep with Hadvar or Ralof (Can occur at any stage between 160 and 195, as you approach the keep.) | |
| 180 | I have been captured by the Empire and sentenced to death alongside the Stormcloak rebels. We were taken to Helgen, but before I could be executed a dragon appeared and attacked the town. I need to find some way to escape. | |
| 250 | Objective 100: Escape Helgen | |
| 255 | Objective 60: Find some equipment (if you followed Hadvar) | |
Objective 65: Loot Gunjar's body (if you followed Ralof) | ||
| 315 | Objective 70: (Optional) Search the barrel for potions | |
| 390 | Objective 75: (Optional) Attempt to pick the lock to the cage | |
| 900 | I have escaped both my execution and a dragon attack at Helgen. I now have my freedom to do as I see fit in Skyrim. | |
- The following empty quest stages were omitted from the table: 0, 2, 3, 5, 6, 7, 8, 9, 10, 12, 14, 15, 20, 22, 25, 26, 27, 28, 30, 32, 35, 37, 39, 40, 41, 42, 43, 45, 46, 50, 52, 54, 56, 58, 60, 62, 64, 65, 67, 70, 75, 80, 81, 82, 84, 85, 90, 95, 97, 98, 99, 100, 120, 130, 140, 145, 190, 195, 200, 202, 210, 220, 240, 252, 256, 257, 258, 260, 265, 267, 268, 270, 272, 275, 280, 285, 290, 292, 300, 305, 310, 317, 318, 320, 340, 350, 360, 365, 368, 370, 380, 395, 400, 450, 460, 470, 480, 485, 490, 500, 550, 560, 600, 630, 650, 700, 705, 710, 720, 725, 730, 750, 760, 780, 800, 1000.
- Any text displayed in angle brackets (e.g.,
<Alias=LocationHold>) is dynamically set by the Radiant Quest system, and will be filled in with the appropriate word(s) when seen in game. - Not all Journal Entries may appear in your journal; which entries appear and which entries do not depends on the manner in which the quest is done.
- Stages are not always in order of progress. This is usually the case with quests that have multiple possible outcomes or quests where certain tasks may be done in any order. Some stages may therefore repeat objectives seen in other stages.
- If an entry is marked as "Finishes Quest" it means the quest disappears from the Active Quest list, but you may still receive new entries for that quest.
- On the PC, it is possible to use the console to advance through the quest by entering
setstage MQ101 stage, wherestageis the number of the stage you wish to complete. It is not possible to un-complete (i.e. go back) quest stages, but it is possible to clear all stages of the quest usingresetquest MQ101.
| Prev: None | Up: Main Quest | Next: Before the Storm |

