Skyrim:Eastmarch

The UESPWiki – Your source for The Elder Scrolls since 1995
< Skyrim: [[:Skyrim:{{#ifeq:{{#explode:Places|/|0}}|Eastmarch||{{#explode:Places|/|0}}}}|{{#ifeq:{{#explode:Places|/|0}}|Eastmarch||{{#explode:Places|/|0}}}}]] / [[:Skyrim:{{#ifeq:{{#explode:Places|/|1}}|Eastmarch||{{#explode:Places|/|1}}}}|{{#ifeq:{{#explode:Places|/|1}}|Eastmarch||{{#explode:Places|/|1}}}}]] / [[:Skyrim:{{#ifeq:{{#explode:Places|/|2}}|Eastmarch||{{#explode:Places|/|2}}}}|{{#ifeq:{{#explode:Places|/|2}}|Eastmarch||{{#explode:Places|/|2}}}}]] / [[:Skyrim:{{#ifeq:{{#explode:Places|/|3}}|Eastmarch||{{#explode:Places|/|3}}}}|{{#ifeq:{{#explode:Places|/|3}}|Eastmarch||{{#explode:Places|/|3}}}}]]: [[:Skyrim:{{#ifeq:{{#explode:{{#switch:Hold |Body of Water=Bodies of Water |City=Cities |Library=Libraries |Ruins=Ruins |Pass=Passes |Docks=Docks |Cemetery=Cemeteries |Other=Other |Barracks=Barracks |Holds }}|/|0}}|Eastmarch||{{#explode:{{#switch:Hold |Body of Water=Bodies of Water |City=Cities |Library=Libraries |Ruins=Ruins |Pass=Passes |Docks=Docks |Cemetery=Cemeteries |Other=Other |Barracks=Barracks |Holds }}|/|0}}}}|{{#ifeq:{{#explode:{{#switch:Hold |Body of Water=Bodies of Water |City=Cities |Library=Libraries |Ruins=Ruins |Pass=Passes |Docks=Docks |Cemetery=Cemeteries |Other=Other |Barracks=Barracks |Holds }}|/|0}}|Eastmarch||{{#explode:{{#switch:Hold |Body of Water=Bodies of Water |City=Cities |Library=Libraries |Ruins=Ruins |Pass=Passes |Docks=Docks |Cemetery=Cemeteries |Other=Other |Barracks=Barracks |Holds }}|/|0}}}}]] / [[:Skyrim:{{#ifeq:{{#explode:{{#switch:Hold |Body of Water=Bodies of Water |City=Cities |Library=Libraries |Ruins=Ruins |Pass=Passes |Docks=Docks |Cemetery=Cemeteries |Other=Other |Barracks=Barracks |Holds }}|/|1}}|Eastmarch||{{#explode:{{#switch:Hold |Body of Water=Bodies of Water |City=Cities |Library=Libraries |Ruins=Ruins |Pass=Passes |Docks=Docks |Cemetery=Cemeteries |Other=Other |Barracks=Barracks |Holds }}|/|1}}}}|{{#ifeq:{{#explode:{{#switch:Hold |Body of Water=Bodies of Water |City=Cities |Library=Libraries |Ruins=Ruins |Pass=Passes |Docks=Docks |Cemetery=Cemeteries |Other=Other |Barracks=Barracks |Holds }}|/|1}}|Eastmarch||{{#explode:{{#switch:Hold |Body of Water=Bodies of Water |City=Cities |Library=Libraries |Ruins=Ruins |Pass=Passes |Docks=Docks |Cemetery=Cemeteries |Other=Other |Barracks=Barracks |Holds }}|/|1}}}}]] / [[:Skyrim:{{#ifeq:{{#explode:{{#switch:Hold |Body of Water=Bodies of Water |City=Cities |Library=Libraries |Ruins=Ruins |Pass=Passes |Docks=Docks |Cemetery=Cemeteries |Other=Other |Barracks=Barracks |Holds }}|/|2}}|Eastmarch||{{#explode:{{#switch:Hold |Body of Water=Bodies of Water |City=Cities |Library=Libraries |Ruins=Ruins |Pass=Passes |Docks=Docks |Cemetery=Cemeteries |Other=Other |Barracks=Barracks |Holds }}|/|2}}}}|{{#ifeq:{{#explode:{{#switch:Hold |Body of Water=Bodies of Water |City=Cities |Library=Libraries |Ruins=Ruins |Pass=Passes |Docks=Docks |Cemetery=Cemeteries |Other=Other |Barracks=Barracks |Holds }}|/|2}}|Eastmarch||{{#explode:{{#switch:Hold |Body of Water=Bodies of Water |City=Cities |Library=Libraries |Ruins=Ruins |Pass=Passes |Docks=Docks |Cemetery=Cemeteries |Other=Other |Barracks=Barracks |Holds }}|/|2}}}}]] / [[:Skyrim:{{#ifeq:{{#explode:{{#switch:Hold |Body of Water=Bodies of Water |City=Cities |Library=Libraries |Ruins=Ruins |Pass=Passes |Docks=Docks |Cemetery=Cemeteries |Other=Other |Barracks=Barracks |Holds }}|/|3}}|Eastmarch||{{#explode:{{#switch:Hold |Body of Water=Bodies of Water |City=Cities |Library=Libraries |Ruins=Ruins |Pass=Passes |Docks=Docks |Cemetery=Cemeteries |Other=Other |Barracks=Barracks |Holds }}|/|3}}}}|{{#ifeq:{{#explode:{{#switch:Hold |Body of Water=Bodies of Water |City=Cities |Library=Libraries |Ruins=Ruins |Pass=Passes |Docks=Docks |Cemetery=Cemeteries |Other=Other |Barracks=Barracks |Holds }}|/|3}}|Eastmarch||{{#explode:{{#switch:Hold |Body of Water=Bodies of Water |City=Cities |Library=Libraries |Ruins=Ruins |Pass=Passes |Docks=Docks |Cemetery=Cemeteries |Other=Other |Barracks=Barracks |Holds }}|/|3}}}}]]: [[:Skyrim:{{#ifeq:{{#explode:|/|0}}|Eastmarch||{{#explode:|/|0}}}}|{{#ifeq:{{#explode:|/|0}}|Eastmarch||{{#explode:|/|0}}}}]] / [[:Skyrim:{{#ifeq:{{#explode:|/|1}}|Eastmarch||{{#explode:|/|1}}}}|{{#ifeq:{{#explode:|/|1}}|Eastmarch||{{#explode:|/|1}}}}]] / [[:Skyrim:{{#ifeq:{{#explode:|/|2}}|Eastmarch||{{#explode:|/|2}}}}|{{#ifeq:{{#explode:|/|2}}|Eastmarch||{{#explode:|/|2}}}}]] / [[:Skyrim:{{#ifeq:{{#explode:|/|3}}|Eastmarch||{{#explode:|/|3}}}}|{{#ifeq:{{#explode:|/|3}}|Eastmarch||{{#explode:|/|3}}}}]]: [[:Skyrim:{{#ifeq:{{#explode:|/|0}}|Eastmarch||{{#explode:|/|0}}}}|{{#ifeq:{{#explode:|/|0}}|Eastmarch||{{#explode:|/|0}}}}]] / [[:Skyrim:{{#ifeq:{{#explode:|/|1}}|Eastmarch||{{#explode:|/|1}}}}|{{#ifeq:{{#explode:|/|1}}|Eastmarch||{{#explode:|/|1}}}}]] / [[:Skyrim:{{#ifeq:{{#explode:|/|2}}|Eastmarch||{{#explode:|/|2}}}}|{{#ifeq:{{#explode:|/|2}}|Eastmarch||{{#explode:|/|2}}}}]] / [[:Skyrim:{{#ifeq:{{#explode:|/|3}}|Eastmarch||{{#explode:|/|3}}}}|{{#ifeq:{{#explode:|/|3}}|Eastmarch||{{#explode:|/|3}}}}]]: [[:Skyrim:{{#ifeq:{{#explode:|/|0}}|Eastmarch||{{#explode:|/|0}}}}|{{#ifeq:{{#explode:|/|0}}|Eastmarch||{{#explode:|/|0}}}}]] / [[:Skyrim:{{#ifeq:{{#explode:|/|1}}|Eastmarch||{{#explode:|/|1}}}}|{{#ifeq:{{#explode:|/|1}}|Eastmarch||{{#explode:|/|1}}}}]] / [[:Skyrim:{{#ifeq:{{#explode:|/|2}}|Eastmarch||{{#explode:|/|2}}}}|{{#ifeq:{{#explode:|/|2}}|Eastmarch||{{#explode:|/|2}}}}]] / [[:Skyrim:{{#ifeq:{{#explode:|/|3}}|Eastmarch||{{#explode:|/|3}}}}|{{#ifeq:{{#explode:|/|3}}|Eastmarch||{{#explode:|/|3}}}}]]
Jump to: navigation, search

{{#switch:Skyrim

 |User|Template|UESPWiki=
 |#default=
   {{#ifeq:sr-place-eastmarch.jpg|none||
     {{#if:SR-place-Eastmarch.jpg|
       {{#switch:square
         |4:3     =
         |standard=
         |square  =}}{{#ifexpr:(({{#iferror:{{#expr:{{#mediawidth:SR-place-Eastmarch.jpg}}/{{#mediaheight:SR-place-Eastmarch.jpg}}}}|0|{{#expr:{{#mediawidth:SR-place-Eastmarch.jpg}}/{{#mediaheight:SR-place-Eastmarch.jpg}}}}}} >= 1.3) and ({{#iferror:{{#expr:{{#mediawidth:SR-place-Eastmarch.jpg}}/{{#mediaheight:SR-place-Eastmarch.jpg}}}}|0|{{#expr:{{#mediawidth:SR-place-Eastmarch.jpg}}/{{#mediaheight:SR-place-Eastmarch.jpg}}}}}}<= 1.35)) or (({{#iferror:{{#expr:{{#mediawidth:SR-place-Eastmarch.jpg}}/{{#mediaheight:SR-place-Eastmarch.jpg}}}}|0|{{#expr:{{#mediawidth:SR-place-Eastmarch.jpg}}/{{#mediaheight:SR-place-Eastmarch.jpg}}}}}} >= 1.58) and ({{#iferror:{{#expr:{{#mediawidth:SR-place-Eastmarch.jpg}}/{{#mediaheight:SR-place-Eastmarch.jpg}}}}|0|{{#expr:{{#mediawidth:SR-place-Eastmarch.jpg}}/{{#mediaheight:SR-place-Eastmarch.jpg}}}}}}<= 1.79))||}}{{#switch:{{#explode:SR-place-Eastmarch.jpg|-|0}}{{#explode:SR-place-Eastmarch.jpg|-|1}}
         |SRplace|SRinterior|SRexterior=
         |#default=}}{{#ifeq:A view of Eastmarch, looking southwest from Steamcrag Camp||}}

|{{#if:|}}

{{{2}}} This article {{#switch:Skyrim

|Daggerfall|Morrowind|Bloodmoon|Tribunal=has been flagged by a Skyrim Redesign project contributor as needing

|could benefit from}} an image{{#if:| of:
{{{1}}}|.}}
See Help:Images for information on how to upload images. {{#if:|This notice will be removed automatically when you add the image to the {{{intemplate}}} template on the page|Please remove this template from the page when finished}}.

{{#switch:Skyrim

|User|Template= |[[Category:Skyrim-{{#if:Place|Place }}Pages Needing Images]]}}

     }}
   }}

}}{{#if:|}}{{#ifeq:none|none||

{{#switch:Skyrim
 |Morrowind|Bloodmoon|Oblivion|Shivering|Skyrim|Dragonborn|Beyond Skyrim|Beyond Skyrim:Cyrodiil={{#if:
  |
  |
 }}
}}

}}{{#if:|{{#if:||{{#if:Places|}}{{#if:{{#switch:Hold |Body of Water=Bodies of Water |City=Cities |Library=Libraries |Ruins=Ruins |Pass=Passes |Docks=Docks |Cemetery=Cemeteries |Other=Other |Barracks=Barracks |Holds }}|}}{{#if:|}}{{#if:|}}{{#if:|}}{{#if:1||{{#if:|[[Category:Skyrim-{{{addcat1}}}]]}}{{#if:|[[Category:Skyrim-{{{addcat2}}}]]}}{{#if:|[[Category:Skyrim-{{{addcat3}}}]]}}{{#if:|[[Category:Skyrim-{{{addcat4}}}]]}}{{#if:|[[Category:Skyrim-{{{addcat5}}}]]}}[[Category:Skyrim-Places-{{#explode:|/|0}}]]{{#if:{{#explode:|/|1}}|[[Category:Skyrim-Places-{{#explode:|/|1}}]]}}{{#if:{{#explode:|/|2}}|[[Category:Skyrim-Places-{{#explode:|/|2}}]]}}{{#if:{{#explode:|/|3}}|[[Category:Skyrim-Places-{{#explode:|/|3}}]]}}{{#if:|[[Category:Skyrim-Places-{{{p5}}}]]}}{{#ifeq:Places|Quests|}}{{#ifeq:Places|Places|}}}}}}}}{{#if:||{{#if:|{{#if:A hold in eastern Skyrim, with its capital in Windhelm.||}}{{#if:|[[Category:Skyrim-Places-{{{citycat}}}]]}}{{#if:|[[Category:Skyrim-Places-{{{citycat}}} {{{district}}}]]}}{{#if:|[[Category:Skyrim-Places-{{{region}}}]]}}{{#if:|[[Category:Skyrim-Places-{{{region2}}}]]}}{{#if:|[[Category:Skyrim-Places-{{{region3}}}]]}}{{#if:|[[Category:Skyrim-Places-{{{oretype}}} Veins]]}}{{#if:|[[Category:Skyrim-Places-{{{oretype2}}} Veins]]}}{{#if:|[[Category:Skyrim-Places-{{{oretype3}}} Veins]]}}{{#if:|[[Category:Skyrim-Places-{{{oretype4}}} Veins]]}}{{#if:|[[Category:Skyrim-Places-{{{oretype5}}} Veins]]}}{{#if:|[[Category:Skyrim-Places-{{{oretype6}}} Veins]]}}{{#if:|[[Category:Skyrim-Places-{{{oretype7}}} Veins]]}}{{#if:|}}{{#if:|}}{{#if:|}}{{#if:|}}{{#if:|}}{{#if:|}}{{#if:|}}{{#if:|}}{{#if:|}}{{#if:|}}{{#if:|}}{{#if:|}}{{#if:|}}{{#if:|}}{{#if:|}}{{#if:|}}{{#if:|}}{{#if:|}}{{#if:|}}{{#if:|}}{{#if:|{{#ifeq:{{{clearable}}}|no||}}}} {{#ifeq:skip|never|}}{{#if:|{{#ifeq:{{{discoverable}}}|no||}}|{{#if:|}}}}}}}}

Hold:
Eastmarch{{#if:({{#iferror:{{#expr:none+1}}||}}{{#switch:sr
 |bm=
 |si=
 |db=
 |on=
 |bs5=
 |bs5c=  

}}{{#switch:beyond

mw|ob|si|sr|db|beyond|bs5|bs5c|eso=view on map [}}|Eastmarch|lore page}}|({{#if:{{#pos:Eastmarch|[}}|Eastmarch|lore page}})}}|
({{#iferror:{{#expr:none+1}}||}}{{#switch:sr
 |bm=
 |si=
 |db=
 |on=
 |bs5=
 |bs5c=  

}}{{#switch:beyond

mw|ob|si|sr|db|beyond|bs5|bs5c|eso=view on map [}}|Eastmarch|lore page}}|({{#if:{{#pos:Eastmarch|[}}|Eastmarch|lore page}})}}}}
Capital Windhelm {{#iferror:{{#expr:Windhelm+1}}||}}{{#switch:sr
 |bm=
 |si=
 |db=
 |on=
 |bs5=
 |bs5c=  

}}{{#switch:beyond

mw|ob|si|sr|db|beyond|bs5|bs5c|eso=(map) #default=Map Link Error}}
Jarl's Residence Palace of the Kings
Military Fort Fort Amol
Initial Affiliation 0|1}}|I=Imperial|S=Stormcloaks|#default=Stormcloak}}
Imperial Government
Jarl Brunwulf Free-Winter
Steward Captain Lonely-Gale (was not properly set to replace Jorleif, see bug)
Stormcloaks Government
Jarl Ulfric Stormcloak
Steward Jorleif
Housecarl Galmar Stone-Fist
Dungeon Yes}}
Respawn Time
 {{#ifeq:skip|never|Never (storage is safe)|Skip}}|
 {{#ifeq:|Yes|10 days or 30 days|10 days}}}}
Services
Available {{{avail}}}

{{#if:|

{{#switch:Skyrim Template=Gold Gold

}}

(}}}}
Room {{#if:| }}[[File:{{#switch:Skyrim Morrowind=MW-icon-Gold.png Skyrim=SR-item-Gold-heads.png Oblivion=OB-icon-Value.png OBMobile=OB-icon-Value.png Online=ON-icon-Gold.png 22px|class=|link={{{link}}}|Value]]{{#if:| }} {{{roomcost}}}
{{#ifeq:Skyrim|Oblivion|Occupants|Occupants}}
{{#if:1|}}}}{{#if:|
Important Treasure
{{{treasure}}}}}
Destinations *{{#if:{{#pos:{{{dest1}}}|[}} {{{dest1}}} {{#switch:{{{dest1}}} none|unknown ={{{dest1}}} #default=[[Skyrim:{{{dest1}}}|{{{dest1}}}]]
 }}

}} }}{{#if:|*{{#if:{{#pos:{{{dest2}}}|[}}

{{{dest2}}} {{#switch:{{{dest2}}} none|unknown ={{{dest2}}} #default=[[Skyrim:{{{dest2}}}|{{{dest2}}}]]
 }}

}} }}{{#if:|*{{#if:{{#pos:{{{dest3}}}|[}}

{{{dest3}}} {{#switch:{{{dest3}}} none|unknown ={{{dest3}}} #default=[[Skyrim:{{{dest3}}}|{{{dest3}}}]]
 }}

}} }}{{#if:|*{{#if:{{#pos:{{{dest4}}}|[}}

{{{dest4}}} {{#switch:{{{dest4}}} none|unknown ={{{dest4}}} #default=[[Skyrim:{{{dest4}}}|{{{dest4}}}]]
 }}

}}}}

Console Location Code(s)
none
Region{{#if:|s}}
{{#if:{{#pos:{{{region}}}|[}} {{{region}}} {{#switch:{{{region}}} none|unknown ={{{region}}} #default=[[Skyrim:{{{region}}}|{{{region}}}]]
 }}

}}{{#if:|, {{#if:{{#pos:{{{region2}}}|[}}

{{{region2}}} {{#switch:{{{region2}}} none|unknown ={{{region2}}} #default=[[Skyrim:{{{region2}}}|{{{region2}}}]]
 }}

}}}}{{#if:|, {{#if:{{#pos:{{{region3}}}|[}}

{{{region3}}} {{#switch:{{{region3}}} none|unknown ={{{region3}}} #default=[[Skyrim:{{{region3}}}|{{{region3}}}]]
 }}

}}}}{{#if:|, {{{coords}}}}}

Location
Eastern Skyrim}}
Special Features
Shadowmark [[File:SR-icon-shadowmark-{{{shadowmark}}}.png|middle|32px|{{#switch:{{{shadowmark}}} escape=Escape Route cache=Thieves' Cache {{{shadowmark}}}
 }}|link=Skyrim:Shadowmarks (Thieves Guild)]] {{#switch:{{{shadowmark}}}
escape=Escape Route cache=Thieves' Cache {{{shadowmark}}}
 }}}}{{#if:|
[[File:SR-icon-shadowmark-{{{shadowmark2}}}.png|middle|32px|{{#switch:{{{shadowmark2}}}
escape=Escape Route cache=Thieves' Cache {{{shadowmark2}}}
 }}|link=Skyrim:Shadowmarks (Thieves Guild)]] {{#switch:{{{shadowmark2}}}
escape=Escape Route cache=Thieves' Cache {{{shadowmark2}}}
 }}}}{{#if:|
[[File:SR-icon-shadowmark-{{{shadowmark3}}}.png|middle|32px|{{#switch:{{{shadowmark3}}}
escape=Escape Route cache=Thieves' Cache {{{shadowmark3}}}
 }}|link=Skyrim:Shadowmarks (Thieves Guild)]] {{#switch:{{{shadowmark3}}}
escape=Escape Route cache=Thieves' Cache {{{shadowmark3}}}
 }}}}{{#if:|
[[File:SR-icon-shadowmark-{{{shadowmark4}}}.png|middle|32px|{{#switch:{{{shadowmark4}}}
escape=Escape Route cache=Thieves' Cache {{{shadowmark4}}}
 }}|link=Skyrim:Shadowmarks (Thieves Guild)]] {{#switch:{{{shadowmark4}}}
escape=Escape Route cache=Thieves' Cache {{{shadowmark4}}}
 }}}}

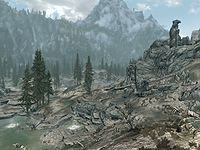
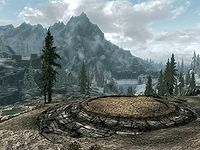
{{#if:|[[File:{{{image}}}|thumb|left|A view of Eastmarch, looking southwest from Steamcrag Camp]]}} {{#if:A hold in eastern Skyrim, with its capital in Windhelm.|Eastmarch {{#if:|are|is}} a hold in eastern Skyrim, with its capital in Windhelm. |{{#if:1|Please add a description for Eastmarch.|Please add a description for Eastmarch.}}{{#switch:Skyrim

|User|Template= |}}}} The hold is the home of Jarl Ulfric Stormcloak, leader of the Stormcloak rebellion. It only becomes Imperial-run if the player joins the Imperial Legion and completes the entire quest line, including both the Battle for Fort Amol and the Battle for Windhelm. Should this occur, the new Jarl will be Brunwulf Free-Winter.

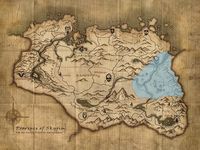
Eastmarch is in the northeastern corner of Skyrim. Winterhold is to the northwest, the Pale and Whiterun Hold to the west, the Throat of the World to the southwest, and the Rift to the south. The Dunmer homeland of Morrowind is to the east, across the Velothi Mountain passes. Since the Red Year, Dunmer have had a much bigger presence in Eastmarch, particularly in the capital, due to its proximity to one of the only passes through the Velothi.

Map of Eastmarch
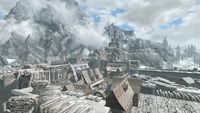
Windhelm, the hold capital

Topographical Overview[edit]

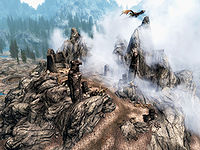
Bonestrewn Crest rises from the sulfur pools

Eastmarch varies greatly. The central and southern parts of Eastmarch are dominated by sulfurous pools and rocky crags, as well as Bonestrewn Crest. The Velothi Mountains form a spine along the eastern edge of the hold, and a high ridge to the south leads up from the lowland sulfur pools to the Rift.

The Darkwater River joins the White River in the west, after which the White River merges with River Yorgrim at the Windhelm bridge and flows out into the Sea of Ghosts.

Flora and Fauna[edit]

The sulfur pools are home to giants, deer, sabre cats, and other, smaller creatures, such as rabbits and goats. Further north are snowy sabre cats, ice wolves, and frost trolls along the road to Morrowind.

There are a few farms near Windhelm, but otherwise the only plant in the snowy parts of Eastmarch is the humble snowberry bush. In the sulfur region to the south, in the middle of the hold, the endemic plants of dragon's tongue, Jazbay grapes, and creep clusters are to be found. The pine forest and shrublands surrounding the sulfur region are home to thistle, snowberries, and all common varieties of mountain flowers. Mora tapinella and to some extent nightshade can also be found throughout the hold. In the last parts of the White River, stretching from Mixwater Mill to the Sea of Ghosts, nordic barnacle is common.

Routes and Pathways[edit]

Two main routes run north to south in Eastmarch. They skirt the sulfur pools on either side. The roads are connected to each other at the far northern and southern ends, forming a continuous loop. There are also major branches off of this road: one west of Fort Amol leading to Whiterun; one west-northwest of Cragslane Cavern leading south to the Rift, and two near Windhelm. One leads to the Pale and beyond, and the other along the Sea of Ghosts past farms until you hit the impassable, invisible wall near Refugees' Rest.

There are two pathways into the sulfur pools from the east road: one runs from south of Kynesgrove to Witchmist Grove, and the other starts near Steamcrag Camp and heads west to Bonestrewn Crest. Other pathways in the hold are to landmarks such as the dragon mound above Kynesgrove (and, by extension, Narzulbur), or Mistwatch.

Places[edit]

All locations in Eastmarch with individual map markers are listed. There are a few places without map markers listed for your convenience.

Hold Capital[edit]

  • {{#if:|{{#ifeq:|{{{modpage}}}||}}}}{{#ifeq:Windhelm|none||}}{{#if:|}}{{#if:SR-mapicon-Windhelm.png|SR-mapicon-Windhelm.png }}{{#if:|Windhelm|Windhelm}}{{ {{{mod}}} }}{{#if:A major city in the northeast of Skyrim near the Dunmeth Pass to Morrowind, and the capital of Eastmarch.| — {{#if:|A major city in the northeast of Skyrim near the Dunmeth Pass to Morrowind, and the capital of Eastmarch.|A major city in the northeast of Skyrim near the Dunmeth Pass to Morrowind, and the capital of Eastmarch.}}}}{{#if:{{#iferror:{{#expr:+1}}||}}{{#switch:sr
 |bm=
 |si=
 |db=
 |on=
 |bs5=
 |bs5c=  

}}{{#switch:beyond |bm|mw|ob|si|sr|db|beyond|bs5|bs5c|eso=(map) |#default=Map Link Error}}| {{#iferror:{{#expr:+1}}||}}{{#switch:sr

 |bm=
 |si=
 |db=
 |on=
 |bs5=
 |bs5c=  

}}{{#switch:beyond |bm|mw|ob|si|sr|db|beyond|bs5|bs5c|eso=(map) |#default=Map Link Error}}}}

  • {{#if:|{{#ifeq:|{{{modpage}}}||}}}}{{#ifeq:Palace of the Kings|none||}}{{#if:|}}{{#if:SR-mapicon-Palace.png|SR-mapicon-Palace.png }}{{#if:|Palace of the Kings|Palace of the Kings}}{{ {{{mod}}} }}{{#if:a large castle at the far end of the Valunstrad district in Windhelm.| — {{#if:|a large castle at the far end of the Valunstrad district in Windhelm.|a large castle at the far end of the Valunstrad district in Windhelm.}}}}{{#if:{{#iferror:{{#expr:+1}}||}}{{#switch:sr
 |bm=
 |si=
 |db=
 |on=
 |bs5=
 |bs5c=  

}}{{#switch:beyond |bm|mw|ob|si|sr|db|beyond|bs5|bs5c|eso=of the Kings|&centeron=Palace+of+the+Kings}}{{#if:|&x={{{x}}}&y=}}{{#if:|&search=%7B%7B%7Bsearch%7D%7D%7D}}{{#if:|&zoom={{{zoom}}}&legacy=true}}{{#if:|&zoom={{{newzoom}}}}}|?{{#sub:{{#if:|&world=}}{{#if:Palace of the Kings|&centeron=Palace+of+the+Kings}}{{#if:|&x={{{x}}}&y=}}{{#if:|&search=%7B%7B%7Bsearch%7D%7D%7D}}{{#if:|&zoom={{{zoom}}}&legacy=true}}{{#if:|&zoom={{{newzoom}}}}}|1}}}} (map) |#default=Map Link Error}}| {{#iferror:{{#expr:+1}}||}}{{#switch:sr

 |bm=
 |si=
 |db=
 |on=
 |bs5=
 |bs5c=  

}}{{#switch:beyond |bm|mw|ob|si|sr|db|beyond|bs5|bs5c|eso=of the Kings|&centeron=Palace+of+the+Kings}}{{#if:|&x={{{x}}}&y=}}{{#if:|&search=%7B%7B%7Bsearch%7D%7D%7D}}{{#if:|&zoom={{{zoom}}}&legacy=true}}{{#if:|&zoom={{{newzoom}}}}}|?{{#sub:{{#if:|&world=}}{{#if:Palace of the Kings|&centeron=Palace+of+the+Kings}}{{#if:|&x={{{x}}}&y=}}{{#if:|&search=%7B%7B%7Bsearch%7D%7D%7D}}{{#if:|&zoom={{{zoom}}}&legacy=true}}{{#if:|&zoom={{{newzoom}}}}}|1}}}} (map) |#default=Map Link Error}}}}

  • {{#if:|{{#ifeq:|{{{modpage}}}||}}}}{{#ifeq:Windhelm Stables|none||}}{{#if:|}}{{#if:SR-mapicon-Stable.png|SR-mapicon-Stable.png }}{{#if:|Windhelm Stables|Windhelm Stables}}{{ {{{mod}}} }}{{#if:A stable outside of Windhelm.| — {{#if:|A stable outside of Windhelm.|A stable outside of Windhelm.}}}}{{#if:{{#iferror:{{#expr:+1}}||}}{{#switch:sr
 |bm=
 |si=
 |db=
 |on=
 |bs5=
 |bs5c=  

}}{{#switch:beyond |bm|mw|ob|si|sr|db|beyond|bs5|bs5c|eso=Stables|&centeron=Windhelm+Stables}}{{#if:|&x={{{x}}}&y=}}{{#if:|&search=%7B%7B%7Bsearch%7D%7D%7D}}{{#if:|&zoom={{{zoom}}}&legacy=true}}{{#if:|&zoom={{{newzoom}}}}}|?{{#sub:{{#if:|&world=}}{{#if:Windhelm Stables|&centeron=Windhelm+Stables}}{{#if:|&x={{{x}}}&y=}}{{#if:|&search=%7B%7B%7Bsearch%7D%7D%7D}}{{#if:|&zoom={{{zoom}}}&legacy=true}}{{#if:|&zoom={{{newzoom}}}}}|1}}}} (map) |#default=Map Link Error}}| {{#iferror:{{#expr:+1}}||}}{{#switch:sr

 |bm=
 |si=
 |db=
 |on=
 |bs5=
 |bs5c=  

}}{{#switch:beyond |bm|mw|ob|si|sr|db|beyond|bs5|bs5c|eso=Stables|&centeron=Windhelm+Stables}}{{#if:|&x={{{x}}}&y=}}{{#if:|&search=%7B%7B%7Bsearch%7D%7D%7D}}{{#if:|&zoom={{{zoom}}}&legacy=true}}{{#if:|&zoom={{{newzoom}}}}}|?{{#sub:{{#if:|&world=}}{{#if:Windhelm Stables|&centeron=Windhelm+Stables}}{{#if:|&x={{{x}}}&y=}}{{#if:|&search=%7B%7B%7Bsearch%7D%7D%7D}}{{#if:|&zoom={{{zoom}}}&legacy=true}}{{#if:|&zoom={{{newzoom}}}}}|1}}}} (map) |#default=Map Link Error}}}}

Farms, Towns, and Settlements including Orc Strongholds and Inns[edit]

  • {{#if:|{{#ifeq:|{{{modpage}}}||}}}}{{#ifeq:Brandy-Mug Farm|none||}}{{#if:|}}{{#if:SR-mapicon-Settlement.png|SR-mapicon-Settlement.png }}{{#if:|Brandy-Mug Farm|Brandy-Mug Farm}}{{ {{{mod}}} }}{{#if:A wheat farm, a short distance east of Windhelm Stables.| — {{#if:|A wheat farm, a short distance east of Windhelm Stables.|A wheat farm, a short distance east of Windhelm Stables.}}}}{{#if:{{#iferror:{{#expr:+1}}||}}{{#switch:sr
 |bm=
 |si=
 |db=
 |on=
 |bs5=
 |bs5c=  

}}{{#switch:beyond |bm|mw|ob|si|sr|db|beyond|bs5|bs5c|eso=Farm|&centeron=Brandy-Mug+Farm}}{{#if:|&x={{{x}}}&y=}}{{#if:|&search=%7B%7B%7Bsearch%7D%7D%7D}}{{#if:|&zoom={{{zoom}}}&legacy=true}}{{#if:|&zoom={{{newzoom}}}}}|?{{#sub:{{#if:|&world=}}{{#if:Brandy-Mug Farm|&centeron=Brandy-Mug+Farm}}{{#if:|&x={{{x}}}&y=}}{{#if:|&search=%7B%7B%7Bsearch%7D%7D%7D}}{{#if:|&zoom={{{zoom}}}&legacy=true}}{{#if:|&zoom={{{newzoom}}}}}|1}}}} (map) |#default=Map Link Error}}| {{#iferror:{{#expr:+1}}||}}{{#switch:sr

 |bm=
 |si=
 |db=
 |on=
 |bs5=
 |bs5c=  

}}{{#switch:beyond |bm|mw|ob|si|sr|db|beyond|bs5|bs5c|eso=Farm|&centeron=Brandy-Mug+Farm}}{{#if:|&x={{{x}}}&y=}}{{#if:|&search=%7B%7B%7Bsearch%7D%7D%7D}}{{#if:|&zoom={{{zoom}}}&legacy=true}}{{#if:|&zoom={{{newzoom}}}}}|?{{#sub:{{#if:|&world=}}{{#if:Brandy-Mug Farm|&centeron=Brandy-Mug+Farm}}{{#if:|&x={{{x}}}&y=}}{{#if:|&search=%7B%7B%7Bsearch%7D%7D%7D}}{{#if:|&zoom={{{zoom}}}&legacy=true}}{{#if:|&zoom={{{newzoom}}}}}|1}}}} (map) |#default=Map Link Error}}}}

  • {{#if:|{{#ifeq:|{{{modpage}}}||}}}}{{#ifeq:Darkwater Crossing|none||}}{{#if:|}}{{#if:SR-mapicon-Mine.png|SR-mapicon-Mine.png }}{{#if:|Darkwater Crossing|Darkwater Crossing}}{{ {{{mod}}} }}{{#if:A small mining camp that operates the Goldenrock Mine.| — {{#if:|A small mining camp that operates the Goldenrock Mine.|A small mining camp that operates the Goldenrock Mine.}}}}{{#if:{{#iferror:{{#expr:+1}}||}}{{#switch:sr
 |bm=
 |si=
 |db=
 |on=
 |bs5=
 |bs5c=  

}}{{#switch:beyond |bm|mw|ob|si|sr|db|beyond|bs5|bs5c|eso=Crossing|&centeron=Darkwater+Crossing}}{{#if:|&x={{{x}}}&y=}}{{#if:|&search=%7B%7B%7Bsearch%7D%7D%7D}}{{#if:|&zoom={{{zoom}}}&legacy=true}}{{#if:|&zoom={{{newzoom}}}}}|?{{#sub:{{#if:|&world=}}{{#if:Darkwater Crossing|&centeron=Darkwater+Crossing}}{{#if:|&x={{{x}}}&y=}}{{#if:|&search=%7B%7B%7Bsearch%7D%7D%7D}}{{#if:|&zoom={{{zoom}}}&legacy=true}}{{#if:|&zoom={{{newzoom}}}}}|1}}}} (map) |#default=Map Link Error}}| {{#iferror:{{#expr:+1}}||}}{{#switch:sr

 |bm=
 |si=
 |db=
 |on=
 |bs5=
 |bs5c=  

}}{{#switch:beyond |bm|mw|ob|si|sr|db|beyond|bs5|bs5c|eso=Crossing|&centeron=Darkwater+Crossing}}{{#if:|&x={{{x}}}&y=}}{{#if:|&search=%7B%7B%7Bsearch%7D%7D%7D}}{{#if:|&zoom={{{zoom}}}&legacy=true}}{{#if:|&zoom={{{newzoom}}}}}|?{{#sub:{{#if:|&world=}}{{#if:Darkwater Crossing|&centeron=Darkwater+Crossing}}{{#if:|&x={{{x}}}&y=}}{{#if:|&search=%7B%7B%7Bsearch%7D%7D%7D}}{{#if:|&zoom={{{zoom}}}&legacy=true}}{{#if:|&zoom={{{newzoom}}}}}|1}}}} (map) |#default=Map Link Error}}}}

  • {{#if:|{{#ifeq:|{{{modpage}}}||}}}}{{#ifeq:Hlaalu Farm|none||}}{{#if:|}}{{#if:SR-mapicon-Farm.png|SR-mapicon-Farm.png }}{{#if:|Hlaalu Farm|Hlaalu Farm}}{{ {{{mod}}} }}{{#if:a small farm east of Windhelm.| — {{#if:|a small farm east of Windhelm.|a small farm east of Windhelm.}}}}{{#if:{{#iferror:{{#expr:+1}}||}}{{#switch:sr
 |bm=
 |si=
 |db=
 |on=
 |bs5=
 |bs5c=  

}}{{#switch:beyond |bm|mw|ob|si|sr|db|beyond|bs5|bs5c|eso=Farm|&centeron=Hlaalu+Farm}}{{#if:|&x={{{x}}}&y=}}{{#if:|&search=%7B%7B%7Bsearch%7D%7D%7D}}{{#if:|&zoom={{{zoom}}}&legacy=true}}{{#if:|&zoom={{{newzoom}}}}}|?{{#sub:{{#if:|&world=}}{{#if:Hlaalu Farm|&centeron=Hlaalu+Farm}}{{#if:|&x={{{x}}}&y=}}{{#if:|&search=%7B%7B%7Bsearch%7D%7D%7D}}{{#if:|&zoom={{{zoom}}}&legacy=true}}{{#if:|&zoom={{{newzoom}}}}}|1}}}} (map) |#default=Map Link Error}}| {{#iferror:{{#expr:+1}}||}}{{#switch:sr

 |bm=
 |si=
 |db=
 |on=
 |bs5=
 |bs5c=  

}}{{#switch:beyond |bm|mw|ob|si|sr|db|beyond|bs5|bs5c|eso=Farm|&centeron=Hlaalu+Farm}}{{#if:|&x={{{x}}}&y=}}{{#if:|&search=%7B%7B%7Bsearch%7D%7D%7D}}{{#if:|&zoom={{{zoom}}}&legacy=true}}{{#if:|&zoom={{{newzoom}}}}}|?{{#sub:{{#if:|&world=}}{{#if:Hlaalu Farm|&centeron=Hlaalu+Farm}}{{#if:|&x={{{x}}}&y=}}{{#if:|&search=%7B%7B%7Bsearch%7D%7D%7D}}{{#if:|&zoom={{{zoom}}}&legacy=true}}{{#if:|&zoom={{{newzoom}}}}}|1}}}} (map) |#default=Map Link Error}}}}

  • {{#if:|{{#ifeq:|{{{modpage}}}||}}}}{{#ifeq:Hollyfrost Farm|none||}}{{#if:|}}{{#if:SR-mapicon-Farm.png|SR-mapicon-Farm.png }}{{#if:|Hollyfrost Farm|Hollyfrost Farm}}{{ {{{mod}}} }}{{#if:a large farm with a single-roomed farmhouse east of Windhelm.| — {{#if:|a large farm with a single-roomed farmhouse east of Windhelm.|a large farm with a single-roomed farmhouse east of Windhelm.}}}}{{#if:{{#iferror:{{#expr:+1}}||}}{{#switch:sr
 |bm=
 |si=
 |db=
 |on=
 |bs5=
 |bs5c=  

}}{{#switch:beyond |bm|mw|ob|si|sr|db|beyond|bs5|bs5c|eso=Farm|&centeron=Hollyfrost+Farm}}{{#if:|&x={{{x}}}&y=}}{{#if:|&search=%7B%7B%7Bsearch%7D%7D%7D}}{{#if:|&zoom={{{zoom}}}&legacy=true}}{{#if:|&zoom={{{newzoom}}}}}|?{{#sub:{{#if:|&world=}}{{#if:Hollyfrost Farm|&centeron=Hollyfrost+Farm}}{{#if:|&x={{{x}}}&y=}}{{#if:|&search=%7B%7B%7Bsearch%7D%7D%7D}}{{#if:|&zoom={{{zoom}}}&legacy=true}}{{#if:|&zoom={{{newzoom}}}}}|1}}}} (map) |#default=Map Link Error}}| {{#iferror:{{#expr:+1}}||}}{{#switch:sr

 |bm=
 |si=
 |db=
 |on=
 |bs5=
 |bs5c=  

}}{{#switch:beyond |bm|mw|ob|si|sr|db|beyond|bs5|bs5c|eso=Farm|&centeron=Hollyfrost+Farm}}{{#if:|&x={{{x}}}&y=}}{{#if:|&search=%7B%7B%7Bsearch%7D%7D%7D}}{{#if:|&zoom={{{zoom}}}&legacy=true}}{{#if:|&zoom={{{newzoom}}}}}|?{{#sub:{{#if:|&world=}}{{#if:Hollyfrost Farm|&centeron=Hollyfrost+Farm}}{{#if:|&x={{{x}}}&y=}}{{#if:|&search=%7B%7B%7Bsearch%7D%7D%7D}}{{#if:|&zoom={{{zoom}}}&legacy=true}}{{#if:|&zoom={{{newzoom}}}}}|1}}}} (map) |#default=Map Link Error}}}}

  • {{#if:|{{#ifeq:|{{{modpage}}}||}}}}{{#ifeq:Kynesgrove|none||}}{{#if:|}}{{#if:SR-mapicon-Settlement.png|SR-mapicon-Settlement.png }}{{#if:|Kynesgrove|Kynesgrove}}{{ {{{mod}}} }}{{#if:A small village located on the road south from Windhelm, in Eastmarch.| — {{#if:|A small village located on the road south from Windhelm, in Eastmarch.|A small village located on the road south from Windhelm, in Eastmarch.}}}}{{#if:{{#iferror:{{#expr:+1}}||}}{{#switch:sr
 |bm=
 |si=
 |db=
 |on=
 |bs5=
 |bs5c=  

}}{{#switch:beyond |bm|mw|ob|si|sr|db|beyond|bs5|bs5c|eso=(map) |#default=Map Link Error}}| {{#iferror:{{#expr:+1}}||}}{{#switch:sr

 |bm=
 |si=
 |db=
 |on=
 |bs5=
 |bs5c=  

}}{{#switch:beyond |bm|mw|ob|si|sr|db|beyond|bs5|bs5c|eso=(map) |#default=Map Link Error}}}}

  • {{#if:|{{#ifeq:|{{{modpage}}}||}}}}{{#ifeq:Mixwater Mill|none||}}{{#if:|}}{{#if:SR-mapicon-Wood Mill.png|SR-mapicon-Wood Mill.png }}{{#if:|Mixwater Mill|Mixwater Mill}}{{ {{{mod}}} }}{{#if:A lumber mill on the White River, southwest of Windhelm and southeast of Gallows Rock.| — {{#if:|A lumber mill on the White River, southwest of Windhelm and southeast of Gallows Rock.|A lumber mill on the White River, southwest of Windhelm and southeast of Gallows Rock.}}}}{{#if:{{#iferror:{{#expr:+1}}||}}{{#switch:sr
 |bm=
 |si=
 |db=
 |on=
 |bs5=
 |bs5c=  

}}{{#switch:beyond |bm|mw|ob|si|sr|db|beyond|bs5|bs5c|eso=Mill|&centeron=Mixwater+Mill}}{{#if:|&x={{{x}}}&y=}}{{#if:|&search=%7B%7B%7Bsearch%7D%7D%7D}}{{#if:|&zoom={{{zoom}}}&legacy=true}}{{#if:|&zoom={{{newzoom}}}}}|?{{#sub:{{#if:|&world=}}{{#if:Mixwater Mill|&centeron=Mixwater+Mill}}{{#if:|&x={{{x}}}&y=}}{{#if:|&search=%7B%7B%7Bsearch%7D%7D%7D}}{{#if:|&zoom={{{zoom}}}&legacy=true}}{{#if:|&zoom={{{newzoom}}}}}|1}}}} (map) |#default=Map Link Error}}| {{#iferror:{{#expr:+1}}||}}{{#switch:sr

 |bm=
 |si=
 |db=
 |on=
 |bs5=
 |bs5c=  

}}{{#switch:beyond |bm|mw|ob|si|sr|db|beyond|bs5|bs5c|eso=Mill|&centeron=Mixwater+Mill}}{{#if:|&x={{{x}}}&y=}}{{#if:|&search=%7B%7B%7Bsearch%7D%7D%7D}}{{#if:|&zoom={{{zoom}}}&legacy=true}}{{#if:|&zoom={{{newzoom}}}}}|?{{#sub:{{#if:|&world=}}{{#if:Mixwater Mill|&centeron=Mixwater+Mill}}{{#if:|&x={{{x}}}&y=}}{{#if:|&search=%7B%7B%7Bsearch%7D%7D%7D}}{{#if:|&zoom={{{zoom}}}&legacy=true}}{{#if:|&zoom={{{newzoom}}}}}|1}}}} (map) |#default=Map Link Error}}}}

  • {{#if:|{{#ifeq:|{{{modpage}}}||}}}}{{#ifeq:Narzulbur|none||}}{{#if:|}}{{#if:SR-mapicon-Orc Stronghold.png|SR-mapicon-Orc Stronghold.png }}{{#if:|Narzulbur|Narzulbur}}{{ {{{mod}}} }}{{#if:an Orc stronghold in the northeast of Skyrim, southeast of Windhelm.| — {{#if:|an Orc stronghold in the northeast of Skyrim, southeast of Windhelm.|an Orc stronghold in the northeast of Skyrim, southeast of Windhelm.}}}}{{#if:{{#iferror:{{#expr:+1}}||}}{{#switch:sr
 |bm=
 |si=
 |db=
 |on=
 |bs5=
 |bs5c=  

}}{{#switch:beyond |bm|mw|ob|si|sr|db|beyond|bs5|bs5c|eso=(map) |#default=Map Link Error}}| {{#iferror:{{#expr:+1}}||}}{{#switch:sr

 |bm=
 |si=
 |db=
 |on=
 |bs5=
 |bs5c=  

}}{{#switch:beyond |bm|mw|ob|si|sr|db|beyond|bs5|bs5c|eso=(map) |#default=Map Link Error}}}}

  • {{#if:|{{#ifeq:|{{{modpage}}}||}}}}{{#ifeq:Riverside Shack|none||}}{{#if:|}}{{#if:SR-mapicon-Shack.png|SR-mapicon-Shack.png }}{{#if:|Riverside Shack|Riverside Shack}}{{ {{{mod}}} }}{{#if:A small shack east of Gallows Rock and west-southwest of Kynesgrove, along the eastern bank of the White River.| — {{#if:|A small shack east of Gallows Rock and west-southwest of Kynesgrove, along the eastern bank of the White River.|A small shack east of Gallows Rock and west-southwest of Kynesgrove, along the eastern bank of the White River.}}}}{{#if:{{#iferror:{{#expr:+1}}||}}{{#switch:sr
 |bm=
 |si=
 |db=
 |on=
 |bs5=
 |bs5c=  

}}{{#switch:beyond |bm|mw|ob|si|sr|db|beyond|bs5|bs5c|eso=Shack|&centeron=Riverside+Shack}}{{#if:|&x={{{x}}}&y=}}{{#if:|&search=%7B%7B%7Bsearch%7D%7D%7D}}{{#if:|&zoom={{{zoom}}}&legacy=true}}{{#if:|&zoom={{{newzoom}}}}}|?{{#sub:{{#if:|&world=}}{{#if:Riverside Shack|&centeron=Riverside+Shack}}{{#if:|&x={{{x}}}&y=}}{{#if:|&search=%7B%7B%7Bsearch%7D%7D%7D}}{{#if:|&zoom={{{zoom}}}&legacy=true}}{{#if:|&zoom={{{newzoom}}}}}|1}}}} (map) |#default=Map Link Error}}| {{#iferror:{{#expr:+1}}||}}{{#switch:sr

 |bm=
 |si=
 |db=
 |on=
 |bs5=
 |bs5c=  

}}{{#switch:beyond |bm|mw|ob|si|sr|db|beyond|bs5|bs5c|eso=Shack|&centeron=Riverside+Shack}}{{#if:|&x={{{x}}}&y=}}{{#if:|&search=%7B%7B%7Bsearch%7D%7D%7D}}{{#if:|&zoom={{{zoom}}}&legacy=true}}{{#if:|&zoom={{{newzoom}}}}}|?{{#sub:{{#if:|&world=}}{{#if:Riverside Shack|&centeron=Riverside+Shack}}{{#if:|&x={{{x}}}&y=}}{{#if:|&search=%7B%7B%7Bsearch%7D%7D%7D}}{{#if:|&zoom={{{zoom}}}&legacy=true}}{{#if:|&zoom={{{newzoom}}}}}|1}}}} (map) |#default=Map Link Error}}}}

  • {{#if:|{{#ifeq:|{{{modpage}}}||}}}}{{#ifeq:Traitor's Post|none||}}{{#if:|}}{{#if:SR-mapicon-Shack.png|SR-mapicon-Shack.png }}{{#if:|Traitor's Post|Traitor's Post}}{{ {{{mod}}} }}{{#if:a crumbling shack and bandit outpost east of Windhelm, and just north of the Sacellum of Boethiah.| — {{#if:|a crumbling shack and bandit outpost east of Windhelm, and just north of the Sacellum of Boethiah.|a crumbling shack and bandit outpost east of Windhelm, and just north of the Sacellum of Boethiah.}}}}{{#if:{{#iferror:{{#expr:+1}}||}}{{#switch:sr
 |bm=
 |si=
 |db=
 |on=
 |bs5=
 |bs5c=  

}}{{#switch:beyond |bm|mw|ob|si|sr|db|beyond|bs5|bs5c|eso=Post|&centeron=Traitor%27s+Post}}{{#if:|&x={{{x}}}&y=}}{{#if:|&search=%7B%7B%7Bsearch%7D%7D%7D}}{{#if:|&zoom={{{zoom}}}&legacy=true}}{{#if:|&zoom={{{newzoom}}}}}|?{{#sub:{{#if:|&world=}}{{#if:Traitor's Post|&centeron=Traitor%27s+Post}}{{#if:|&x={{{x}}}&y=}}{{#if:|&search=%7B%7B%7Bsearch%7D%7D%7D}}{{#if:|&zoom={{{zoom}}}&legacy=true}}{{#if:|&zoom={{{newzoom}}}}}|1}}}} (map) |#default=Map Link Error}}| {{#iferror:{{#expr:+1}}||}}{{#switch:sr

 |bm=
 |si=
 |db=
 |on=
 |bs5=
 |bs5c=  

}}{{#switch:beyond |bm|mw|ob|si|sr|db|beyond|bs5|bs5c|eso=Post|&centeron=Traitor%27s+Post}}{{#if:|&x={{{x}}}&y=}}{{#if:|&search=%7B%7B%7Bsearch%7D%7D%7D}}{{#if:|&zoom={{{zoom}}}&legacy=true}}{{#if:|&zoom={{{newzoom}}}}}|?{{#sub:{{#if:|&world=}}{{#if:Traitor's Post|&centeron=Traitor%27s+Post}}{{#if:|&x={{{x}}}&y=}}{{#if:|&search=%7B%7B%7Bsearch%7D%7D%7D}}{{#if:|&zoom={{{zoom}}}&legacy=true}}{{#if:|&zoom={{{newzoom}}}}}|1}}}} (map) |#default=Map Link Error}}}}

Camps, including Giant Camps and Military Camps[edit]

  • {{#if:|{{#ifeq:|{{{modpage}}}||}}}}{{#ifeq:Broken Limb Camp|none||}}{{#if:|}}{{#if:SR-mapicon-Giant Camp.png|SR-mapicon-Giant Camp.png }}{{#if:|Broken Limb Camp|Broken Limb Camp}}{{ {{{mod}}} }}{{#if:A giant camp on the edge of the hot springs in Eastmarch near the bank of the White River.| — {{#if:|A giant camp on the edge of the hot springs in Eastmarch near the bank of the White River.|A giant camp on the edge of the hot springs in Eastmarch near the bank of the White River.}}}}{{#if:{{#iferror:{{#expr:+1}}||}}{{#switch:sr
 |bm=
 |si=
 |db=
 |on=
 |bs5=
 |bs5c=  

}}{{#switch:beyond |bm|mw|ob|si|sr|db|beyond|bs5|bs5c|eso=Limb Camp|&centeron=Broken+Limb+Camp}}{{#if:|&x={{{x}}}&y=}}{{#if:|&search=%7B%7B%7Bsearch%7D%7D%7D}}{{#if:|&zoom={{{zoom}}}&legacy=true}}{{#if:|&zoom={{{newzoom}}}}}|?{{#sub:{{#if:|&world=}}{{#if:Broken Limb Camp|&centeron=Broken+Limb+Camp}}{{#if:|&x={{{x}}}&y=}}{{#if:|&search=%7B%7B%7Bsearch%7D%7D%7D}}{{#if:|&zoom={{{zoom}}}&legacy=true}}{{#if:|&zoom={{{newzoom}}}}}|1}}}} (map) |#default=Map Link Error}}| {{#iferror:{{#expr:+1}}||}}{{#switch:sr

 |bm=
 |si=
 |db=
 |on=
 |bs5=
 |bs5c=  

}}{{#switch:beyond |bm|mw|ob|si|sr|db|beyond|bs5|bs5c|eso=Limb Camp|&centeron=Broken+Limb+Camp}}{{#if:|&x={{{x}}}&y=}}{{#if:|&search=%7B%7B%7Bsearch%7D%7D%7D}}{{#if:|&zoom={{{zoom}}}&legacy=true}}{{#if:|&zoom={{{newzoom}}}}}|?{{#sub:{{#if:|&world=}}{{#if:Broken Limb Camp|&centeron=Broken+Limb+Camp}}{{#if:|&x={{{x}}}&y=}}{{#if:|&search=%7B%7B%7Bsearch%7D%7D%7D}}{{#if:|&zoom={{{zoom}}}&legacy=true}}{{#if:|&zoom={{{newzoom}}}}}|1}}}} (map) |#default=Map Link Error}}}}

  • {{#if:|{{#ifeq:|{{{modpage}}}||}}}}{{#ifeq:Cradlecrush Rock|none||}}{{#if:|}}{{#if:SR-mapicon-Giant Camp.png|SR-mapicon-Giant Camp.png }}{{#if:|Cradlecrush Rock|Cradlecrush Rock}}{{ {{{mod}}} }}{{#if:A giant camp containing only one giant.| — {{#if:|A giant camp containing only one giant.|A giant camp containing only one giant.}}}}{{#if:{{#iferror:{{#expr:+1}}||}}{{#switch:sr
 |bm=
 |si=
 |db=
 |on=
 |bs5=
 |bs5c=  

}}{{#switch:beyond |bm|mw|ob|si|sr|db|beyond|bs5|bs5c|eso=Rock|&centeron=Cradlecrush+Rock}}{{#if:|&x={{{x}}}&y=}}{{#if:|&search=%7B%7B%7Bsearch%7D%7D%7D}}{{#if:|&zoom={{{zoom}}}&legacy=true}}{{#if:|&zoom={{{newzoom}}}}}|?{{#sub:{{#if:|&world=}}{{#if:Cradlecrush Rock|&centeron=Cradlecrush+Rock}}{{#if:|&x={{{x}}}&y=}}{{#if:|&search=%7B%7B%7Bsearch%7D%7D%7D}}{{#if:|&zoom={{{zoom}}}&legacy=true}}{{#if:|&zoom={{{newzoom}}}}}|1}}}} (map) |#default=Map Link Error}}| {{#iferror:{{#expr:+1}}||}}{{#switch:sr

 |bm=
 |si=
 |db=
 |on=
 |bs5=
 |bs5c=  

}}{{#switch:beyond |bm|mw|ob|si|sr|db|beyond|bs5|bs5c|eso=Rock|&centeron=Cradlecrush+Rock}}{{#if:|&x={{{x}}}&y=}}{{#if:|&search=%7B%7B%7Bsearch%7D%7D%7D}}{{#if:|&zoom={{{zoom}}}&legacy=true}}{{#if:|&zoom={{{newzoom}}}}}|?{{#sub:{{#if:|&world=}}{{#if:Cradlecrush Rock|&centeron=Cradlecrush+Rock}}{{#if:|&x={{{x}}}&y=}}{{#if:|&search=%7B%7B%7Bsearch%7D%7D%7D}}{{#if:|&zoom={{{zoom}}}&legacy=true}}{{#if:|&zoom={{{newzoom}}}}}|1}}}} (map) |#default=Map Link Error}}}}

 |bm=
 |si=
 |db=
 |on=
 |bs5=
 |bs5c=  

}}{{#switch:beyond |bm|mw|ob|si|sr|db|beyond|bs5|bs5c|eso=Imperial Camp|&centeron=Eastmarch+Imperial+Camp}}{{#if:|&x={{{x}}}&y=}}{{#if:|&search=%7B%7B%7Bsearch%7D%7D%7D}}{{#if:|&zoom={{{zoom}}}&legacy=true}}{{#if:|&zoom={{{newzoom}}}}}|?{{#sub:{{#if:|&world=}}{{#if:Eastmarch Imperial Camp|&centeron=Eastmarch+Imperial+Camp}}{{#if:|&x={{{x}}}&y=}}{{#if:|&search=%7B%7B%7Bsearch%7D%7D%7D}}{{#if:|&zoom={{{zoom}}}&legacy=true}}{{#if:|&zoom={{{newzoom}}}}}|1}}}} (map) |#default=Map Link Error}}| {{#iferror:{{#expr:+1}}||}}{{#switch:sr

 |bm=
 |si=
 |db=
 |on=
 |bs5=
 |bs5c=  

}}{{#switch:beyond |bm|mw|ob|si|sr|db|beyond|bs5|bs5c|eso=Imperial Camp|&centeron=Eastmarch+Imperial+Camp}}{{#if:|&x={{{x}}}&y=}}{{#if:|&search=%7B%7B%7Bsearch%7D%7D%7D}}{{#if:|&zoom={{{zoom}}}&legacy=true}}{{#if:|&zoom={{{newzoom}}}}}|?{{#sub:{{#if:|&world=}}{{#if:Eastmarch Imperial Camp|&centeron=Eastmarch+Imperial+Camp}}{{#if:|&x={{{x}}}&y=}}{{#if:|&search=%7B%7B%7Bsearch%7D%7D%7D}}{{#if:|&zoom={{{zoom}}}&legacy=true}}{{#if:|&zoom={{{newzoom}}}}}|1}}}} (map) |#default=Map Link Error}}}}

  • {{#if:|{{#ifeq:|{{{modpage}}}||}}}}{{#ifeq:Steamcrag Camp|none||}}{{#if:|}}{{#if:SR-mapicon-Giant Camp.png|SR-mapicon-Giant Camp.png }}{{#if:|Steamcrag Camp|Steamcrag Camp}}{{ {{{mod}}} }}{{#if:A giant camp south of Windhelm and east of Bonestrewn Crest.| — {{#if:|A giant camp south of Windhelm and east of Bonestrewn Crest.|A giant camp south of Windhelm and east of Bonestrewn Crest.}}}}{{#if:{{#iferror:{{#expr:+1}}||}}{{#switch:sr
 |bm=
 |si=
 |db=
 |on=
 |bs5=
 |bs5c=  

}}{{#switch:beyond |bm|mw|ob|si|sr|db|beyond|bs5|bs5c|eso=Camp|&centeron=Steamcrag+Camp}}{{#if:|&x={{{x}}}&y=}}{{#if:|&search=%7B%7B%7Bsearch%7D%7D%7D}}{{#if:|&zoom={{{zoom}}}&legacy=true}}{{#if:|&zoom={{{newzoom}}}}}|?{{#sub:{{#if:|&world=}}{{#if:Steamcrag Camp|&centeron=Steamcrag+Camp}}{{#if:|&x={{{x}}}&y=}}{{#if:|&search=%7B%7B%7Bsearch%7D%7D%7D}}{{#if:|&zoom={{{zoom}}}&legacy=true}}{{#if:|&zoom={{{newzoom}}}}}|1}}}} (map) |#default=Map Link Error}}| {{#iferror:{{#expr:+1}}||}}{{#switch:sr

 |bm=
 |si=
 |db=
 |on=
 |bs5=
 |bs5c=  

}}{{#switch:beyond |bm|mw|ob|si|sr|db|beyond|bs5|bs5c|eso=Camp|&centeron=Steamcrag+Camp}}{{#if:|&x={{{x}}}&y=}}{{#if:|&search=%7B%7B%7Bsearch%7D%7D%7D}}{{#if:|&zoom={{{zoom}}}&legacy=true}}{{#if:|&zoom={{{newzoom}}}}}|?{{#sub:{{#if:|&world=}}{{#if:Steamcrag Camp|&centeron=Steamcrag+Camp}}{{#if:|&x={{{x}}}&y=}}{{#if:|&search=%7B%7B%7Bsearch%7D%7D%7D}}{{#if:|&zoom={{{zoom}}}&legacy=true}}{{#if:|&zoom={{{newzoom}}}}}|1}}}} (map) |#default=Map Link Error}}}}

 |bm=
 |si=
 |db=
 |on=
 |bs5=
 |bs5c=  

}}{{#switch:beyond |bm|mw|ob|si|sr|db|beyond|bs5|bs5c|eso=Military Camp|&centeron=Windhelm+Military+Camp}}{{#if:|&x={{{x}}}&y=}}{{#if:|&search=%7B%7B%7Bsearch%7D%7D%7D}}{{#if:|&zoom={{{zoom}}}&legacy=true}}{{#if:|&zoom={{{newzoom}}}}}|?{{#sub:{{#if:|&world=}}{{#if:Windhelm Military Camp|&centeron=Windhelm+Military+Camp}}{{#if:|&x={{{x}}}&y=}}{{#if:|&search=%7B%7B%7Bsearch%7D%7D%7D}}{{#if:|&zoom={{{zoom}}}&legacy=true}}{{#if:|&zoom={{{newzoom}}}}}|1}}}} (map) |#default=Map Link Error}}| {{#iferror:{{#expr:+1}}||}}{{#switch:sr

 |bm=
 |si=
 |db=
 |on=
 |bs5=
 |bs5c=  

}}{{#switch:beyond |bm|mw|ob|si|sr|db|beyond|bs5|bs5c|eso=Military Camp|&centeron=Windhelm+Military+Camp}}{{#if:|&x={{{x}}}&y=}}{{#if:|&search=%7B%7B%7Bsearch%7D%7D%7D}}{{#if:|&zoom={{{zoom}}}&legacy=true}}{{#if:|&zoom={{{newzoom}}}}}|?{{#sub:{{#if:|&world=}}{{#if:Windhelm Military Camp|&centeron=Windhelm+Military+Camp}}{{#if:|&x={{{x}}}&y=}}{{#if:|&search=%7B%7B%7Bsearch%7D%7D%7D}}{{#if:|&zoom={{{zoom}}}&legacy=true}}{{#if:|&zoom={{{newzoom}}}}}|1}}}} (map) |#default=Map Link Error}}}}

Caves[edit]

  • {{#if:|{{#ifeq:|{{{modpage}}}||}}}}{{#ifeq:Cragslane Cavern|none||}}{{#if:|}}{{#if:SR-mapicon-Cave.png|SR-mapicon-Cave.png }}{{#if:|Cragslane Cavern|Cragslane Cavern}}{{ {{{mod}}} }}{{#if:A small cave being used by bandits for skooma operations and animal blood sports.| — {{#if:|A small cave being used by bandits for skooma operations and animal blood sports.|A small cave being used by bandits for skooma operations and animal blood sports.}}}}{{#if:{{#iferror:{{#expr:+1}}||}}{{#switch:sr
 |bm=
 |si=
 |db=
 |on=
 |bs5=
 |bs5c=  

}}{{#switch:beyond |bm|mw|ob|si|sr|db|beyond|bs5|bs5c|eso=Cavern|&centeron=Cragslane+Cavern}}{{#if:|&x={{{x}}}&y=}}{{#if:|&search=%7B%7B%7Bsearch%7D%7D%7D}}{{#if:|&zoom={{{zoom}}}&legacy=true}}{{#if:|&zoom={{{newzoom}}}}}|?{{#sub:{{#if:|&world=}}{{#if:Cragslane Cavern|&centeron=Cragslane+Cavern}}{{#if:|&x={{{x}}}&y=}}{{#if:|&search=%7B%7B%7Bsearch%7D%7D%7D}}{{#if:|&zoom={{{zoom}}}&legacy=true}}{{#if:|&zoom={{{newzoom}}}}}|1}}}} (map) |#default=Map Link Error}}| {{#iferror:{{#expr:+1}}||}}{{#switch:sr

 |bm=
 |si=
 |db=
 |on=
 |bs5=
 |bs5c=  

}}{{#switch:beyond |bm|mw|ob|si|sr|db|beyond|bs5|bs5c|eso=Cavern|&centeron=Cragslane+Cavern}}{{#if:|&x={{{x}}}&y=}}{{#if:|&search=%7B%7B%7Bsearch%7D%7D%7D}}{{#if:|&zoom={{{zoom}}}&legacy=true}}{{#if:|&zoom={{{newzoom}}}}}|?{{#sub:{{#if:|&world=}}{{#if:Cragslane Cavern|&centeron=Cragslane+Cavern}}{{#if:|&x={{{x}}}&y=}}{{#if:|&search=%7B%7B%7Bsearch%7D%7D%7D}}{{#if:|&zoom={{{zoom}}}&legacy=true}}{{#if:|&zoom={{{newzoom}}}}}|1}}}} (map) |#default=Map Link Error}}}}

  • {{#if:|{{#ifeq:|{{{modpage}}}||}}}}{{#ifeq:Cragwallow Slope|none||}}{{#if:|}}{{#if:SR-mapicon-Cave.png|SR-mapicon-Cave.png }}{{#if:|Cragwallow Slope|Cragwallow Slope}}{{ {{{mod}}} }}{{#if:A medium-sized cave southeast of Windhelm home to conjurers and atronachs.| — {{#if:|A medium-sized cave southeast of Windhelm home to conjurers and atronachs.|A medium-sized cave southeast of Windhelm home to conjurers and atronachs.}}}}{{#if:{{#iferror:{{#expr:+1}}||}}{{#switch:sr
 |bm=
 |si=
 |db=
 |on=
 |bs5=
 |bs5c=  

}}{{#switch:beyond |bm|mw|ob|si|sr|db|beyond|bs5|bs5c|eso=Slope|&centeron=Cragwallow+Slope}}{{#if:|&x={{{x}}}&y=}}{{#if:|&search=%7B%7B%7Bsearch%7D%7D%7D}}{{#if:|&zoom={{{zoom}}}&legacy=true}}{{#if:|&zoom={{{newzoom}}}}}|?{{#sub:{{#if:|&world=}}{{#if:Cragwallow Slope|&centeron=Cragwallow+Slope}}{{#if:|&x={{{x}}}&y=}}{{#if:|&search=%7B%7B%7Bsearch%7D%7D%7D}}{{#if:|&zoom={{{zoom}}}&legacy=true}}{{#if:|&zoom={{{newzoom}}}}}|1}}}} (map) |#default=Map Link Error}}| {{#iferror:{{#expr:+1}}||}}{{#switch:sr

 |bm=
 |si=
 |db=
 |on=
 |bs5=
 |bs5c=  

}}{{#switch:beyond |bm|mw|ob|si|sr|db|beyond|bs5|bs5c|eso=Slope|&centeron=Cragwallow+Slope}}{{#if:|&x={{{x}}}&y=}}{{#if:|&search=%7B%7B%7Bsearch%7D%7D%7D}}{{#if:|&zoom={{{zoom}}}&legacy=true}}{{#if:|&zoom={{{newzoom}}}}}|?{{#sub:{{#if:|&world=}}{{#if:Cragwallow Slope|&centeron=Cragwallow+Slope}}{{#if:|&x={{{x}}}&y=}}{{#if:|&search=%7B%7B%7Bsearch%7D%7D%7D}}{{#if:|&zoom={{{zoom}}}&legacy=true}}{{#if:|&zoom={{{newzoom}}}}}|1}}}} (map) |#default=Map Link Error}}}}

  • {{#if:|{{#ifeq:|{{{modpage}}}||}}}}{{#ifeq:Cronvangr Cave|none||}}{{#if:|}}{{#if:SR-mapicon-Cave.png|SR-mapicon-Cave.png }}{{#if:|Cronvangr Cave|Cronvangr Cave}}{{ {{{mod}}} }}{{#if:A medium-sized cave southwest of Kynesgrove, inhabited by frostbite spiders and vampires.| — {{#if:|A medium-sized cave southwest of Kynesgrove, inhabited by frostbite spiders and vampires.|A medium-sized cave southwest of Kynesgrove, inhabited by frostbite spiders and vampires.}}}}{{#if:{{#iferror:{{#expr:+1}}||}}{{#switch:sr
 |bm=
 |si=
 |db=
 |on=
 |bs5=
 |bs5c=  

}}{{#switch:beyond |bm|mw|ob|si|sr|db|beyond|bs5|bs5c|eso=Cave|&centeron=Cronvangr+Cave}}{{#if:|&x={{{x}}}&y=}}{{#if:|&search=%7B%7B%7Bsearch%7D%7D%7D}}{{#if:|&zoom={{{zoom}}}&legacy=true}}{{#if:|&zoom={{{newzoom}}}}}|?{{#sub:{{#if:|&world=}}{{#if:Cronvangr Cave|&centeron=Cronvangr+Cave}}{{#if:|&x={{{x}}}&y=}}{{#if:|&search=%7B%7B%7Bsearch%7D%7D%7D}}{{#if:|&zoom={{{zoom}}}&legacy=true}}{{#if:|&zoom={{{newzoom}}}}}|1}}}} (map) |#default=Map Link Error}}| {{#iferror:{{#expr:+1}}||}}{{#switch:sr

 |bm=
 |si=
 |db=
 |on=
 |bs5=
 |bs5c=  

}}{{#switch:beyond |bm|mw|ob|si|sr|db|beyond|bs5|bs5c|eso=Cave|&centeron=Cronvangr+Cave}}{{#if:|&x={{{x}}}&y=}}{{#if:|&search=%7B%7B%7Bsearch%7D%7D%7D}}{{#if:|&zoom={{{zoom}}}&legacy=true}}{{#if:|&zoom={{{newzoom}}}}}|?{{#sub:{{#if:|&world=}}{{#if:Cronvangr Cave|&centeron=Cronvangr+Cave}}{{#if:|&x={{{x}}}&y=}}{{#if:|&search=%7B%7B%7Bsearch%7D%7D%7D}}{{#if:|&zoom={{{zoom}}}&legacy=true}}{{#if:|&zoom={{{newzoom}}}}}|1}}}} (map) |#default=Map Link Error}}}}

  • {{#if:|{{#ifeq:|{{{modpage}}}||}}}}{{#ifeq:Eldergleam Sanctuary|none||}}{{#if:|}}{{#if:SR-mapicon-Cave.png|SR-mapicon-Cave.png }}{{#if:|Eldergleam Sanctuary|Eldergleam Sanctuary}}{{ {{{mod}}} }}{{#if:an underground grove and worship site of the followers of Kynareth.| — {{#if:|an underground grove and worship site of the followers of Kynareth.|an underground grove and worship site of the followers of Kynareth.}}}}{{#if:{{#iferror:{{#expr:+1}}||}}{{#switch:sr
 |bm=
 |si=
 |db=
 |on=
 |bs5=
 |bs5c=  

}}{{#switch:beyond |bm|mw|ob|si|sr|db|beyond|bs5|bs5c|eso=Sanctuary|&centeron=Eldergleam+Sanctuary}}{{#if:|&x={{{x}}}&y=}}{{#if:|&search=%7B%7B%7Bsearch%7D%7D%7D}}{{#if:|&zoom={{{zoom}}}&legacy=true}}{{#if:|&zoom={{{newzoom}}}}}|?{{#sub:{{#if:|&world=}}{{#if:Eldergleam Sanctuary|&centeron=Eldergleam+Sanctuary}}{{#if:|&x={{{x}}}&y=}}{{#if:|&search=%7B%7B%7Bsearch%7D%7D%7D}}{{#if:|&zoom={{{zoom}}}&legacy=true}}{{#if:|&zoom={{{newzoom}}}}}|1}}}} (map) |#default=Map Link Error}}| {{#iferror:{{#expr:+1}}||}}{{#switch:sr

 |bm=
 |si=
 |db=
 |on=
 |bs5=
 |bs5c=  

}}{{#switch:beyond |bm|mw|ob|si|sr|db|beyond|bs5|bs5c|eso=Sanctuary|&centeron=Eldergleam+Sanctuary}}{{#if:|&x={{{x}}}&y=}}{{#if:|&search=%7B%7B%7Bsearch%7D%7D%7D}}{{#if:|&zoom={{{zoom}}}&legacy=true}}{{#if:|&zoom={{{newzoom}}}}}|?{{#sub:{{#if:|&world=}}{{#if:Eldergleam Sanctuary|&centeron=Eldergleam+Sanctuary}}{{#if:|&x={{{x}}}&y=}}{{#if:|&search=%7B%7B%7Bsearch%7D%7D%7D}}{{#if:|&zoom={{{zoom}}}&legacy=true}}{{#if:|&zoom={{{newzoom}}}}}|1}}}} (map) |#default=Map Link Error}}}}

  • {{#if:Skyrim:Nchuanthumz: Dwarven Home|{{#ifeq:|Skyrim:Nchuanthumz: Dwarven Home||}}}}{{#ifeq:Frostroot Cave (CC)|none||}}{{#if:|}}{{#if:SR-mapicon-Cave.png|SR-mapicon-Cave.png }}{{#if:|Frostroot Cave|Frostroot Cave}}CC{{#if:a cave in Eastmarch, north of Kagrenzel.| — {{#if:|a cave in Eastmarch, north of Kagrenzel.|a cave in Eastmarch, north of Kagrenzel.}}}}{{#if:{{#iferror:{{#expr:+1}}||}}{{#switch:sr
 |bm=
 |si=
 |db=
 |on=
 |bs5=
 |bs5c=  

}}{{#switch:beyond |bm|mw|ob|si|sr|db|beyond|bs5|bs5c|eso=Cave (CC)|&centeron=Frostroot+Cave+%28CC%29}}{{#if:|&x={{{x}}}&y=}}{{#if:|&search=%7B%7B%7Bsearch%7D%7D%7D}}{{#if:|&zoom={{{zoom}}}&legacy=true}}{{#if:|&zoom={{{newzoom}}}}}|?{{#sub:{{#if:|&world=}}{{#if:Frostroot Cave (CC)|&centeron=Frostroot+Cave+%28CC%29}}{{#if:|&x={{{x}}}&y=}}{{#if:|&search=%7B%7B%7Bsearch%7D%7D%7D}}{{#if:|&zoom={{{zoom}}}&legacy=true}}{{#if:|&zoom={{{newzoom}}}}}|1}}}} (map) |#default=Map Link Error}}| {{#iferror:{{#expr:+1}}||}}{{#switch:sr

 |bm=
 |si=
 |db=
 |on=
 |bs5=
 |bs5c=  

}}{{#switch:beyond |bm|mw|ob|si|sr|db|beyond|bs5|bs5c|eso=Cave (CC)|&centeron=Frostroot+Cave+%28CC%29}}{{#if:|&x={{{x}}}&y=}}{{#if:|&search=%7B%7B%7Bsearch%7D%7D%7D}}{{#if:|&zoom={{{zoom}}}&legacy=true}}{{#if:|&zoom={{{newzoom}}}}}|?{{#sub:{{#if:|&world=}}{{#if:Frostroot Cave (CC)|&centeron=Frostroot+Cave+%28CC%29}}{{#if:|&x={{{x}}}&y=}}{{#if:|&search=%7B%7B%7Bsearch%7D%7D%7D}}{{#if:|&zoom={{{zoom}}}&legacy=true}}{{#if:|&zoom={{{newzoom}}}}}|1}}}} (map) |#default=Map Link Error}}}}

  • {{#if:|{{#ifeq:|{{{modpage}}}||}}}}{{#ifeq:Lost Knife Hideout|none||}}{{#if:|}}{{#if:SR-mapicon-Cave.png|SR-mapicon-Cave.png }}{{#if:|Lost Knife Hideout|Lost Knife Hideout}}{{ {{{mod}}} }}{{#if:a large cave that serves as the hideout for the Lost Knife bandits.| — {{#if:|a large cave that serves as the hideout for the Lost Knife bandits.|a large cave that serves as the hideout for the Lost Knife bandits.}}}}{{#if:{{#iferror:{{#expr:+1}}||}}{{#switch:sr
 |bm=
 |si=
 |db=
 |on=
 |bs5=
 |bs5c=  

}}{{#switch:beyond |bm|mw|ob|si|sr|db|beyond|bs5|bs5c|eso=Knife Hideout|&centeron=Lost+Knife+Hideout}}{{#if:|&x={{{x}}}&y=}}{{#if:|&search=%7B%7B%7Bsearch%7D%7D%7D}}{{#if:|&zoom={{{zoom}}}&legacy=true}}{{#if:|&zoom={{{newzoom}}}}}|?{{#sub:{{#if:|&world=}}{{#if:Lost Knife Hideout|&centeron=Lost+Knife+Hideout}}{{#if:|&x={{{x}}}&y=}}{{#if:|&search=%7B%7B%7Bsearch%7D%7D%7D}}{{#if:|&zoom={{{zoom}}}&legacy=true}}{{#if:|&zoom={{{newzoom}}}}}|1}}}} (map) |#default=Map Link Error}}| {{#iferror:{{#expr:+1}}||}}{{#switch:sr

 |bm=
 |si=
 |db=
 |on=
 |bs5=
 |bs5c=  

}}{{#switch:beyond |bm|mw|ob|si|sr|db|beyond|bs5|bs5c|eso=Knife Hideout|&centeron=Lost+Knife+Hideout}}{{#if:|&x={{{x}}}&y=}}{{#if:|&search=%7B%7B%7Bsearch%7D%7D%7D}}{{#if:|&zoom={{{zoom}}}&legacy=true}}{{#if:|&zoom={{{newzoom}}}}}|?{{#sub:{{#if:|&world=}}{{#if:Lost Knife Hideout|&centeron=Lost+Knife+Hideout}}{{#if:|&x={{{x}}}&y=}}{{#if:|&search=%7B%7B%7Bsearch%7D%7D%7D}}{{#if:|&zoom={{{zoom}}}&legacy=true}}{{#if:|&zoom={{{newzoom}}}}}|1}}}} (map) |#default=Map Link Error}}}}

  • {{#if:|{{#ifeq:|{{{modpage}}}||}}}}{{#ifeq:Mara's Eye Den|none||}}{{#if:|}}{{#if:SR-mapicon-Cave.png|SR-mapicon-Cave.png }}{{#if:|Mara's Eye Den|Mara's Eye Den}}{{ {{{mod}}} }}{{#if:A small cave found on the middle island of Mara's Eye Pond.| — {{#if:|A small cave found on the middle island of Mara's Eye Pond.|A small cave found on the middle island of Mara's Eye Pond.}}}}{{#if:{{#iferror:{{#expr:+1}}||}}{{#switch:sr
 |bm=
 |si=
 |db=
 |on=
 |bs5=
 |bs5c=  

}}{{#switch:beyond |bm|mw|ob|si|sr|db|beyond|bs5|bs5c|eso=Eye Den|&centeron=Mara%27s+Eye+Den}}{{#if:|&x={{{x}}}&y=}}{{#if:|&search=%7B%7B%7Bsearch%7D%7D%7D}}{{#if:|&zoom={{{zoom}}}&legacy=true}}{{#if:|&zoom={{{newzoom}}}}}|?{{#sub:{{#if:|&world=}}{{#if:Mara's Eye Den|&centeron=Mara%27s+Eye+Den}}{{#if:|&x={{{x}}}&y=}}{{#if:|&search=%7B%7B%7Bsearch%7D%7D%7D}}{{#if:|&zoom={{{zoom}}}&legacy=true}}{{#if:|&zoom={{{newzoom}}}}}|1}}}} (map) |#default=Map Link Error}}| {{#iferror:{{#expr:+1}}||}}{{#switch:sr

 |bm=
 |si=
 |db=
 |on=
 |bs5=
 |bs5c=  

}}{{#switch:beyond |bm|mw|ob|si|sr|db|beyond|bs5|bs5c|eso=Eye Den|&centeron=Mara%27s+Eye+Den}}{{#if:|&x={{{x}}}&y=}}{{#if:|&search=%7B%7B%7Bsearch%7D%7D%7D}}{{#if:|&zoom={{{zoom}}}&legacy=true}}{{#if:|&zoom={{{newzoom}}}}}|?{{#sub:{{#if:|&world=}}{{#if:Mara's Eye Den|&centeron=Mara%27s+Eye+Den}}{{#if:|&x={{{x}}}&y=}}{{#if:|&search=%7B%7B%7Bsearch%7D%7D%7D}}{{#if:|&zoom={{{zoom}}}&legacy=true}}{{#if:|&zoom={{{newzoom}}}}}|1}}}} (map) |#default=Map Link Error}}}}

  • {{#if:|{{#ifeq:|{{{modpage}}}||}}}}{{#ifeq:Snapleg Cave|none||}}{{#if:|}}{{#if:SR-mapicon-Cave.png|SR-mapicon-Cave.png }}{{#if:|Snapleg Cave|Snapleg Cave}}{{ {{{mod}}} }}{{#if:A medium-sized cave northwest of Rift Watchtower occupied by hags and monsters.| — {{#if:|A medium-sized cave northwest of Rift Watchtower occupied by hags and monsters.|A medium-sized cave northwest of Rift Watchtower occupied by hags and monsters.}}}}{{#if:{{#iferror:{{#expr:+1}}||}}{{#switch:sr
 |bm=
 |si=
 |db=
 |on=
 |bs5=
 |bs5c=  

}}{{#switch:beyond |bm|mw|ob|si|sr|db|beyond|bs5|bs5c|eso=Cave|&centeron=Snapleg+Cave}}{{#if:|&x={{{x}}}&y=}}{{#if:|&search=%7B%7B%7Bsearch%7D%7D%7D}}{{#if:|&zoom={{{zoom}}}&legacy=true}}{{#if:|&zoom={{{newzoom}}}}}|?{{#sub:{{#if:|&world=}}{{#if:Snapleg Cave|&centeron=Snapleg+Cave}}{{#if:|&x={{{x}}}&y=}}{{#if:|&search=%7B%7B%7Bsearch%7D%7D%7D}}{{#if:|&zoom={{{zoom}}}&legacy=true}}{{#if:|&zoom={{{newzoom}}}}}|1}}}} (map) |#default=Map Link Error}}| {{#iferror:{{#expr:+1}}||}}{{#switch:sr

 |bm=
 |si=
 |db=
 |on=
 |bs5=
 |bs5c=  

}}{{#switch:beyond |bm|mw|ob|si|sr|db|beyond|bs5|bs5c|eso=Cave|&centeron=Snapleg+Cave}}{{#if:|&x={{{x}}}&y=}}{{#if:|&search=%7B%7B%7Bsearch%7D%7D%7D}}{{#if:|&zoom={{{zoom}}}&legacy=true}}{{#if:|&zoom={{{newzoom}}}}}|?{{#sub:{{#if:|&world=}}{{#if:Snapleg Cave|&centeron=Snapleg+Cave}}{{#if:|&x={{{x}}}&y=}}{{#if:|&search=%7B%7B%7Bsearch%7D%7D%7D}}{{#if:|&zoom={{{zoom}}}&legacy=true}}{{#if:|&zoom={{{newzoom}}}}}|1}}}} (map) |#default=Map Link Error}}}}

  • {{#if:|{{#ifeq:|{{{modpage}}}||}}}}{{#ifeq:Stony Creek Cave|none||}}{{#if:|}}{{#if:SR-mapicon-Cave.png|SR-mapicon-Cave.png }}{{#if:|Stony Creek Cave|Stony Creek Cave}}{{ {{{mod}}} }}{{#if:A small cave located in the southeastern corner of Eastmarch that is occupied by bandits.| — {{#if:|A small cave located in the southeastern corner of Eastmarch that is occupied by bandits.|A small cave located in the southeastern corner of Eastmarch that is occupied by bandits.}}}}{{#if:{{#iferror:{{#expr:+1}}||}}{{#switch:sr
 |bm=
 |si=
 |db=
 |on=
 |bs5=
 |bs5c=  

}}{{#switch:beyond |bm|mw|ob|si|sr|db|beyond|bs5|bs5c|eso=Creek Cave|&centeron=Stony+Creek+Cave}}{{#if:|&x={{{x}}}&y=}}{{#if:|&search=%7B%7B%7Bsearch%7D%7D%7D}}{{#if:|&zoom={{{zoom}}}&legacy=true}}{{#if:|&zoom={{{newzoom}}}}}|?{{#sub:{{#if:|&world=}}{{#if:Stony Creek Cave|&centeron=Stony+Creek+Cave}}{{#if:|&x={{{x}}}&y=}}{{#if:|&search=%7B%7B%7Bsearch%7D%7D%7D}}{{#if:|&zoom={{{zoom}}}&legacy=true}}{{#if:|&zoom={{{newzoom}}}}}|1}}}} (map) |#default=Map Link Error}}| {{#iferror:{{#expr:+1}}||}}{{#switch:sr

 |bm=
 |si=
 |db=
 |on=
 |bs5=
 |bs5c=  

}}{{#switch:beyond |bm|mw|ob|si|sr|db|beyond|bs5|bs5c|eso=Creek Cave|&centeron=Stony+Creek+Cave}}{{#if:|&x={{{x}}}&y=}}{{#if:|&search=%7B%7B%7Bsearch%7D%7D%7D}}{{#if:|&zoom={{{zoom}}}&legacy=true}}{{#if:|&zoom={{{newzoom}}}}}|?{{#sub:{{#if:|&world=}}{{#if:Stony Creek Cave|&centeron=Stony+Creek+Cave}}{{#if:|&x={{{x}}}&y=}}{{#if:|&search=%7B%7B%7Bsearch%7D%7D%7D}}{{#if:|&zoom={{{zoom}}}&legacy=true}}{{#if:|&zoom={{{newzoom}}}}}|1}}}} (map) |#default=Map Link Error}}}}

  • {{#if:|{{#ifeq:|{{{modpage}}}||}}}}{{#ifeq:Uttering Hills Cave|none||}}{{#if:|}}{{#if:SR-mapicon-Cave.png|SR-mapicon-Cave.png }}{{#if:|Uttering Hills Cave|Uttering Hills Cave}}{{ {{{mod}}} }}{{#if:a small cave in the mountains southwest of Windhelm occupied by bandits.| — {{#if:|a small cave in the mountains southwest of Windhelm occupied by bandits.|a small cave in the mountains southwest of Windhelm occupied by bandits.}}}}{{#if:{{#iferror:{{#expr:+1}}||}}{{#switch:sr
 |bm=
 |si=
 |db=
 |on=
 |bs5=
 |bs5c=  

}}{{#switch:beyond |bm|mw|ob|si|sr|db|beyond|bs5|bs5c|eso=Hills Cave|&centeron=Uttering+Hills+Cave}}{{#if:|&x={{{x}}}&y=}}{{#if:|&search=%7B%7B%7Bsearch%7D%7D%7D}}{{#if:|&zoom={{{zoom}}}&legacy=true}}{{#if:|&zoom={{{newzoom}}}}}|?{{#sub:{{#if:|&world=}}{{#if:Uttering Hills Cave|&centeron=Uttering+Hills+Cave}}{{#if:|&x={{{x}}}&y=}}{{#if:|&search=%7B%7B%7Bsearch%7D%7D%7D}}{{#if:|&zoom={{{zoom}}}&legacy=true}}{{#if:|&zoom={{{newzoom}}}}}|1}}}} (map) |#default=Map Link Error}}| {{#iferror:{{#expr:+1}}||}}{{#switch:sr

 |bm=
 |si=
 |db=
 |on=
 |bs5=
 |bs5c=  

}}{{#switch:beyond |bm|mw|ob|si|sr|db|beyond|bs5|bs5c|eso=Hills Cave|&centeron=Uttering+Hills+Cave}}{{#if:|&x={{{x}}}&y=}}{{#if:|&search=%7B%7B%7Bsearch%7D%7D%7D}}{{#if:|&zoom={{{zoom}}}&legacy=true}}{{#if:|&zoom={{{newzoom}}}}}|?{{#sub:{{#if:|&world=}}{{#if:Uttering Hills Cave|&centeron=Uttering+Hills+Cave}}{{#if:|&x={{{x}}}&y=}}{{#if:|&search=%7B%7B%7Bsearch%7D%7D%7D}}{{#if:|&zoom={{{zoom}}}&legacy=true}}{{#if:|&zoom={{{newzoom}}}}}|1}}}} (map) |#default=Map Link Error}}}}

Dragon Lairs[edit]

  • {{#if:|{{#ifeq:|{{{modpage}}}||}}}}{{#ifeq:Bonestrewn Crest|none||}}{{#if:|}}{{#if:SR-mapicon-Dragon Lair.png|SR-mapicon-Dragon Lair.png }}{{#if:|Bonestrewn Crest|Bonestrewn Crest}}{{ {{{mod}}} }}{{#if:A mountaintop dragon lair south of Windhelm.| — {{#if:|A mountaintop dragon lair south of Windhelm.|A mountaintop dragon lair south of Windhelm.}}}}{{#if:{{#iferror:{{#expr:+1}}||}}{{#switch:sr
 |bm=
 |si=
 |db=
 |on=
 |bs5=
 |bs5c=  

}}{{#switch:beyond |bm|mw|ob|si|sr|db|beyond|bs5|bs5c|eso=Crest|&centeron=Bonestrewn+Crest}}{{#if:|&x={{{x}}}&y=}}{{#if:|&search=%7B%7B%7Bsearch%7D%7D%7D}}{{#if:|&zoom={{{zoom}}}&legacy=true}}{{#if:|&zoom={{{newzoom}}}}}|?{{#sub:{{#if:|&world=}}{{#if:Bonestrewn Crest|&centeron=Bonestrewn+Crest}}{{#if:|&x={{{x}}}&y=}}{{#if:|&search=%7B%7B%7Bsearch%7D%7D%7D}}{{#if:|&zoom={{{zoom}}}&legacy=true}}{{#if:|&zoom={{{newzoom}}}}}|1}}}} (map) |#default=Map Link Error}}| {{#iferror:{{#expr:+1}}||}}{{#switch:sr

 |bm=
 |si=
 |db=
 |on=
 |bs5=
 |bs5c=  

}}{{#switch:beyond |bm|mw|ob|si|sr|db|beyond|bs5|bs5c|eso=Crest|&centeron=Bonestrewn+Crest}}{{#if:|&x={{{x}}}&y=}}{{#if:|&search=%7B%7B%7Bsearch%7D%7D%7D}}{{#if:|&zoom={{{zoom}}}&legacy=true}}{{#if:|&zoom={{{newzoom}}}}}|?{{#sub:{{#if:|&world=}}{{#if:Bonestrewn Crest|&centeron=Bonestrewn+Crest}}{{#if:|&x={{{x}}}&y=}}{{#if:|&search=%7B%7B%7Bsearch%7D%7D%7D}}{{#if:|&zoom={{{zoom}}}&legacy=true}}{{#if:|&zoom={{{newzoom}}}}}|1}}}} (map) |#default=Map Link Error}}}}

Mines[edit]

  • {{#if:|{{#ifeq:|{{{modpage}}}||}}}}{{#ifeq:Gloombound Mine|none||}}{{#if:|}}{{#if:SR-mapicon-Mine.png|SR-mapicon-Mine.png }}{{#if:|Gloombound Mine|Gloombound Mine}}{{ {{{mod}}} }}{{#if:A small ebony and iron mine supporting the Orc stronghold of Narzulbur with a smelter near the entrance.| — {{#if:|A small ebony and iron mine supporting the Orc stronghold of Narzulbur with a smelter near the entrance.|A small ebony and iron mine supporting the Orc stronghold of Narzulbur with a smelter near the entrance.}}}}{{#if:{{#iferror:{{#expr:+1}}||}}{{#switch:sr
 |bm=
 |si=
 |db=
 |on=
 |bs5=
 |bs5c=  

}}{{#switch:beyond |bm|mw|ob|si|sr|db|beyond|bs5|bs5c|eso=Mine|&centeron=Gloombound+Mine}}{{#if:|&x={{{x}}}&y=}}{{#if:|&search=%7B%7B%7Bsearch%7D%7D%7D}}{{#if:|&zoom={{{zoom}}}&legacy=true}}{{#if:|&zoom={{{newzoom}}}}}|?{{#sub:{{#if:|&world=}}{{#if:Gloombound Mine|&centeron=Gloombound+Mine}}{{#if:|&x={{{x}}}&y=}}{{#if:|&search=%7B%7B%7Bsearch%7D%7D%7D}}{{#if:|&zoom={{{zoom}}}&legacy=true}}{{#if:|&zoom={{{newzoom}}}}}|1}}}} (map) |#default=Map Link Error}}| {{#iferror:{{#expr:+1}}||}}{{#switch:sr

 |bm=
 |si=
 |db=
 |on=
 |bs5=
 |bs5c=  

}}{{#switch:beyond |bm|mw|ob|si|sr|db|beyond|bs5|bs5c|eso=Mine|&centeron=Gloombound+Mine}}{{#if:|&x={{{x}}}&y=}}{{#if:|&search=%7B%7B%7Bsearch%7D%7D%7D}}{{#if:|&zoom={{{zoom}}}&legacy=true}}{{#if:|&zoom={{{newzoom}}}}}|?{{#sub:{{#if:|&world=}}{{#if:Gloombound Mine|&centeron=Gloombound+Mine}}{{#if:|&x={{{x}}}&y=}}{{#if:|&search=%7B%7B%7Bsearch%7D%7D%7D}}{{#if:|&zoom={{{zoom}}}&legacy=true}}{{#if:|&zoom={{{newzoom}}}}}|1}}}} (map) |#default=Map Link Error}}}}

  • {{#if:|{{#ifeq:|{{{modpage}}}||}}}}{{#ifeq:Goldenrock Mine|none||}}{{#if:|}}{{#if:SR-mapicon-Mine.png|SR-mapicon-Mine.png }}{{#if:|Goldenrock Mine|Goldenrock Mine}}{{ {{{mod}}} }}{{#if:A small corundum mine in Darkwater Crossing with a smelter near the entrance.| — {{#if:|A small corundum mine in Darkwater Crossing with a smelter near the entrance.|A small corundum mine in Darkwater Crossing with a smelter near the entrance.}}}}{{#if:{{#iferror:{{#expr:+1}}||}}{{#switch:sr
 |bm=
 |si=
 |db=
 |on=
 |bs5=
 |bs5c=  

}}{{#switch:beyond |bm|mw|ob|si|sr|db|beyond|bs5|bs5c|eso=Mine|&centeron=Goldenrock+Mine}}{{#if:|&x={{{x}}}&y=}}{{#if:|&search=%7B%7B%7Bsearch%7D%7D%7D}}{{#if:|&zoom={{{zoom}}}&legacy=true}}{{#if:|&zoom={{{newzoom}}}}}|?{{#sub:{{#if:|&world=}}{{#if:Goldenrock Mine|&centeron=Goldenrock+Mine}}{{#if:|&x={{{x}}}&y=}}{{#if:|&search=%7B%7B%7Bsearch%7D%7D%7D}}{{#if:|&zoom={{{zoom}}}&legacy=true}}{{#if:|&zoom={{{newzoom}}}}}|1}}}} (map) |#default=Map Link Error}}| {{#iferror:{{#expr:+1}}||}}{{#switch:sr

 |bm=
 |si=
 |db=
 |on=
 |bs5=
 |bs5c=  

}}{{#switch:beyond |bm|mw|ob|si|sr|db|beyond|bs5|bs5c|eso=Mine|&centeron=Goldenrock+Mine}}{{#if:|&x={{{x}}}&y=}}{{#if:|&search=%7B%7B%7Bsearch%7D%7D%7D}}{{#if:|&zoom={{{zoom}}}&legacy=true}}{{#if:|&zoom={{{newzoom}}}}}|?{{#sub:{{#if:|&world=}}{{#if:Goldenrock Mine|&centeron=Goldenrock+Mine}}{{#if:|&x={{{x}}}&y=}}{{#if:|&search=%7B%7B%7Bsearch%7D%7D%7D}}{{#if:|&zoom={{{zoom}}}&legacy=true}}{{#if:|&zoom={{{newzoom}}}}}|1}}}} (map) |#default=Map Link Error}}}}

Ruins including Dwarven and Nordic Ruins[edit]

  • {{#if:|{{#ifeq:|{{{modpage}}}||}}}}{{#ifeq:Ansilvund|none||}}{{#if:|}}{{#if:SR-mapicon-Nordic Ruin.png|SR-mapicon-Nordic Ruin.png }}{{#if:|Ansilvund|Ansilvund}}{{ {{{mod}}} }}{{#if:A medium-sized Nordic ruin north of Riften containing draugr and necromancers.| — {{#if:|A medium-sized Nordic ruin north of Riften containing draugr and necromancers.|A medium-sized Nordic ruin north of Riften containing draugr and necromancers.}}}}{{#if:{{#iferror:{{#expr:+1}}||}}{{#switch:sr
 |bm=
 |si=
 |db=
 |on=
 |bs5=
 |bs5c=  

}}{{#switch:beyond |bm|mw|ob|si|sr|db|beyond|bs5|bs5c|eso=(map) |#default=Map Link Error}}| {{#iferror:{{#expr:+1}}||}}{{#switch:sr

 |bm=
 |si=
 |db=
 |on=
 |bs5=
 |bs5c=  

}}{{#switch:beyond |bm|mw|ob|si|sr|db|beyond|bs5|bs5c|eso=(map) |#default=Map Link Error}}}}

  • {{#if:|{{#ifeq:|{{{modpage}}}||}}}}{{#ifeq:Hillgrund's Tomb|none||}}{{#if:|}}{{#if:SR-mapicon-Nordic Ruin.png|SR-mapicon-Nordic Ruin.png }}{{#if:|Hillgrund's Tomb|Hillgrund's Tomb}}{{ {{{mod}}} }}{{#if:A small Nordic ruin where Golldir's dead ancestors are interred.| — {{#if:|A small Nordic ruin where Golldir's dead ancestors are interred.|A small Nordic ruin where Golldir's dead ancestors are interred.}}}}{{#if:{{#iferror:{{#expr:+1}}||}}{{#switch:sr
 |bm=
 |si=
 |db=
 |on=
 |bs5=
 |bs5c=  

}}{{#switch:beyond |bm|mw|ob|si|sr|db|beyond|bs5|bs5c|eso=Tomb|&centeron=Hillgrund%27s+Tomb}}{{#if:|&x={{{x}}}&y=}}{{#if:|&search=%7B%7B%7Bsearch%7D%7D%7D}}{{#if:|&zoom={{{zoom}}}&legacy=true}}{{#if:|&zoom={{{newzoom}}}}}|?{{#sub:{{#if:|&world=}}{{#if:Hillgrund's Tomb|&centeron=Hillgrund%27s+Tomb}}{{#if:|&x={{{x}}}&y=}}{{#if:|&search=%7B%7B%7Bsearch%7D%7D%7D}}{{#if:|&zoom={{{zoom}}}&legacy=true}}{{#if:|&zoom={{{newzoom}}}}}|1}}}} (map) |#default=Map Link Error}}| {{#iferror:{{#expr:+1}}||}}{{#switch:sr

 |bm=
 |si=
 |db=
 |on=
 |bs5=
 |bs5c=  

}}{{#switch:beyond |bm|mw|ob|si|sr|db|beyond|bs5|bs5c|eso=Tomb|&centeron=Hillgrund%27s+Tomb}}{{#if:|&x={{{x}}}&y=}}{{#if:|&search=%7B%7B%7Bsearch%7D%7D%7D}}{{#if:|&zoom={{{zoom}}}&legacy=true}}{{#if:|&zoom={{{newzoom}}}}}|?{{#sub:{{#if:|&world=}}{{#if:Hillgrund's Tomb|&centeron=Hillgrund%27s+Tomb}}{{#if:|&x={{{x}}}&y=}}{{#if:|&search=%7B%7B%7Bsearch%7D%7D%7D}}{{#if:|&zoom={{{zoom}}}&legacy=true}}{{#if:|&zoom={{{newzoom}}}}}|1}}}} (map) |#default=Map Link Error}}}}

  • {{#if:|{{#ifeq:|{{{modpage}}}||}}}}{{#ifeq:Kagrenzel|none||}}{{#if:|}}{{#if:SR-mapicon-Dwemer.png|SR-mapicon-Dwemer.png }}{{#if:|Kagrenzel|Kagrenzel}}{{ {{{mod}}} }}{{#if:A small Dwarven ruin southeast of Windhelm containing Falmer.| — {{#if:|A small Dwarven ruin southeast of Windhelm containing Falmer.|A small Dwarven ruin southeast of Windhelm containing Falmer.}}}}{{#if:{{#iferror:{{#expr:+1}}||}}{{#switch:sr
 |bm=
 |si=
 |db=
 |on=
 |bs5=
 |bs5c=  

}}{{#switch:beyond |bm|mw|ob|si|sr|db|beyond|bs5|bs5c|eso=(map) |#default=Map Link Error}}| {{#iferror:{{#expr:+1}}||}}{{#switch:sr

 |bm=
 |si=
 |db=
 |on=
 |bs5=
 |bs5c=  

}}{{#switch:beyond |bm|mw|ob|si|sr|db|beyond|bs5|bs5c|eso=(map) |#default=Map Link Error}}}}

  • {{#if:|{{#ifeq:|{{{modpage}}}||}}}}{{#ifeq:Mzulft|none||}}{{#if:|}}{{#if:SR-mapicon-Dwemer.png|SR-mapicon-Dwemer.png }}{{#if:|Mzulft|Mzulft}}{{ {{{mod}}} }}{{#if:a large Dwarven ruin south-southeast of Windhelm, along the main road between Windhelm and Riften.| — {{#if:|a large Dwarven ruin south-southeast of Windhelm, along the main road between Windhelm and Riften.|a large Dwarven ruin south-southeast of Windhelm, along the main road between Windhelm and Riften.}}}}{{#if:{{#iferror:{{#expr:+1}}||}}{{#switch:sr
 |bm=
 |si=
 |db=
 |on=
 |bs5=
 |bs5c=  

}}{{#switch:beyond |bm|mw|ob|si|sr|db|beyond|bs5|bs5c|eso=(map) |#default=Map Link Error}}| {{#iferror:{{#expr:+1}}||}}{{#switch:sr

 |bm=
 |si=
 |db=
 |on=
 |bs5=
 |bs5c=  

}}{{#switch:beyond |bm|mw|ob|si|sr|db|beyond|bs5|bs5c|eso=(map) |#default=Map Link Error}}}}

Towers and Forts[edit]

  • {{#if:|{{#ifeq:|{{{modpage}}}||}}}}{{#ifeq:Abandoned Prison|none||}}{{#if:|}}{{#if:SR-mapicon-Imperial Tower.png|SR-mapicon-Imperial Tower.png }}{{#if:|Abandoned Prison|Abandoned Prison}}{{ {{{mod}}} }}{{#if:A collapsed, partially flooded Imperial prison inhabited by the ghosts of its drowned prisoners.| — {{#if:|A collapsed, partially flooded Imperial prison inhabited by the ghosts of its drowned prisoners.|A collapsed, partially flooded Imperial prison inhabited by the ghosts of its drowned prisoners.}}}}{{#if:{{#iferror:{{#expr:+1}}||}}{{#switch:sr
 |bm=
 |si=
 |db=
 |on=
 |bs5=
 |bs5c=  

}}{{#switch:beyond |bm|mw|ob|si|sr|db|beyond|bs5|bs5c|eso=Prison|&centeron=Abandoned+Prison}}{{#if:|&x={{{x}}}&y=}}{{#if:|&search=%7B%7B%7Bsearch%7D%7D%7D}}{{#if:|&zoom={{{zoom}}}&legacy=true}}{{#if:|&zoom={{{newzoom}}}}}|?{{#sub:{{#if:|&world=}}{{#if:Abandoned Prison|&centeron=Abandoned+Prison}}{{#if:|&x={{{x}}}&y=}}{{#if:|&search=%7B%7B%7Bsearch%7D%7D%7D}}{{#if:|&zoom={{{zoom}}}&legacy=true}}{{#if:|&zoom={{{newzoom}}}}}|1}}}} (map) |#default=Map Link Error}}| {{#iferror:{{#expr:+1}}||}}{{#switch:sr

 |bm=
 |si=
 |db=
 |on=
 |bs5=
 |bs5c=  

}}{{#switch:beyond |bm|mw|ob|si|sr|db|beyond|bs5|bs5c|eso=Prison|&centeron=Abandoned+Prison}}{{#if:|&x={{{x}}}&y=}}{{#if:|&search=%7B%7B%7Bsearch%7D%7D%7D}}{{#if:|&zoom={{{zoom}}}&legacy=true}}{{#if:|&zoom={{{newzoom}}}}}|?{{#sub:{{#if:|&world=}}{{#if:Abandoned Prison|&centeron=Abandoned+Prison}}{{#if:|&x={{{x}}}&y=}}{{#if:|&search=%7B%7B%7Bsearch%7D%7D%7D}}{{#if:|&zoom={{{zoom}}}&legacy=true}}{{#if:|&zoom={{{newzoom}}}}}|1}}}} (map) |#default=Map Link Error}}}}

  • {{#if:|{{#ifeq:|{{{modpage}}}||}}}}{{#ifeq:Fort Amol|none||}}{{#if:|}}{{#if:SR-mapicon-Fort.png|SR-mapicon-Fort.png }}{{#if:|Fort Amol|Fort Amol}}{{ {{{mod}}} }}{{#if:A medium-sized fort northwest of Darkwater Crossing along the White River, initially occupied by elemental mages.| — {{#if:|A medium-sized fort northwest of Darkwater Crossing along the White River, initially occupied by elemental mages.|A medium-sized fort northwest of Darkwater Crossing along the White River, initially occupied by elemental mages.}}}}{{#if:{{#iferror:{{#expr:+1}}||}}{{#switch:sr
 |bm=
 |si=
 |db=
 |on=
 |bs5=
 |bs5c=  

}}{{#switch:beyond |bm|mw|ob|si|sr|db|beyond|bs5|bs5c|eso=Amol|&centeron=Fort+Amol}}{{#if:|&x={{{x}}}&y=}}{{#if:|&search=%7B%7B%7Bsearch%7D%7D%7D}}{{#if:|&zoom={{{zoom}}}&legacy=true}}{{#if:|&zoom={{{newzoom}}}}}|?{{#sub:{{#if:|&world=}}{{#if:Fort Amol|&centeron=Fort+Amol}}{{#if:|&x={{{x}}}&y=}}{{#if:|&search=%7B%7B%7Bsearch%7D%7D%7D}}{{#if:|&zoom={{{zoom}}}&legacy=true}}{{#if:|&zoom={{{newzoom}}}}}|1}}}} (map) |#default=Map Link Error}}| {{#iferror:{{#expr:+1}}||}}{{#switch:sr

 |bm=
 |si=
 |db=
 |on=
 |bs5=
 |bs5c=  

}}{{#switch:beyond |bm|mw|ob|si|sr|db|beyond|bs5|bs5c|eso=Amol|&centeron=Fort+Amol}}{{#if:|&x={{{x}}}&y=}}{{#if:|&search=%7B%7B%7Bsearch%7D%7D%7D}}{{#if:|&zoom={{{zoom}}}&legacy=true}}{{#if:|&zoom={{{newzoom}}}}}|?{{#sub:{{#if:|&world=}}{{#if:Fort Amol|&centeron=Fort+Amol}}{{#if:|&x={{{x}}}&y=}}{{#if:|&search=%7B%7B%7Bsearch%7D%7D%7D}}{{#if:|&zoom={{{zoom}}}&legacy=true}}{{#if:|&zoom={{{newzoom}}}}}|1}}}} (map) |#default=Map Link Error}}}}

  • {{#if:|{{#ifeq:|{{{modpage}}}||}}}}{{#ifeq:Gallows Rock|none||}}{{#if:|}}{{#if:SR-mapicon-Fort.png|SR-mapicon-Fort.png }}{{#if:|Gallows Rock|Gallows Rock}}{{ {{{mod}}} }}{{#if:A small fort occupied by the Silver Hand.| — {{#if:|A small fort occupied by the Silver Hand.|A small fort occupied by the Silver Hand.}}}}{{#if:{{#iferror:{{#expr:+1}}||}}{{#switch:sr
 |bm=
 |si=
 |db=
 |on=
 |bs5=
 |bs5c=  

}}{{#switch:beyond |bm|mw|ob|si|sr|db|beyond|bs5|bs5c|eso=Rock|&centeron=Gallows+Rock}}{{#if:|&x={{{x}}}&y=}}{{#if:|&search=%7B%7B%7Bsearch%7D%7D%7D}}{{#if:|&zoom={{{zoom}}}&legacy=true}}{{#if:|&zoom={{{newzoom}}}}}|?{{#sub:{{#if:|&world=}}{{#if:Gallows Rock|&centeron=Gallows+Rock}}{{#if:|&x={{{x}}}&y=}}{{#if:|&search=%7B%7B%7Bsearch%7D%7D%7D}}{{#if:|&zoom={{{zoom}}}&legacy=true}}{{#if:|&zoom={{{newzoom}}}}}|1}}}} (map) |#default=Map Link Error}}| {{#iferror:{{#expr:+1}}||}}{{#switch:sr

 |bm=
 |si=
 |db=
 |on=
 |bs5=
 |bs5c=  

}}{{#switch:beyond |bm|mw|ob|si|sr|db|beyond|bs5|bs5c|eso=Rock|&centeron=Gallows+Rock}}{{#if:|&x={{{x}}}&y=}}{{#if:|&search=%7B%7B%7Bsearch%7D%7D%7D}}{{#if:|&zoom={{{zoom}}}&legacy=true}}{{#if:|&zoom={{{newzoom}}}}}|?{{#sub:{{#if:|&world=}}{{#if:Gallows Rock|&centeron=Gallows+Rock}}{{#if:|&x={{{x}}}&y=}}{{#if:|&search=%7B%7B%7Bsearch%7D%7D%7D}}{{#if:|&zoom={{{zoom}}}&legacy=true}}{{#if:|&zoom={{{newzoom}}}}}|1}}}} (map) |#default=Map Link Error}}}}

  • {{#if:|{{#ifeq:|{{{modpage}}}||}}}}{{#ifeq:Mistwatch|none||}}{{#if:|}}{{#if:SR-mapicon-Fort.png|SR-mapicon-Fort.png }}{{#if:|Mistwatch|Mistwatch}}{{ {{{mod}}} }}{{#if:A medium-sized fort located at the northern base of the mountains on the border of the Rift and Eastmarch, just southeast of the Atronach Stone on the edge of the hot springs.| — {{#if:|A medium-sized fort located at the northern base of the mountains on the border of the Rift and Eastmarch, just southeast of the Atronach Stone on the edge of the hot springs.|A medium-sized fort located at the northern base of the mountains on the border of the Rift and Eastmarch, just southeast of the Atronach Stone on the edge of the hot springs.}}}}{{#if:{{#iferror:{{#expr:+1}}||}}{{#switch:sr
 |bm=
 |si=
 |db=
 |on=
 |bs5=
 |bs5c=  

}}{{#switch:beyond |bm|mw|ob|si|sr|db|beyond|bs5|bs5c|eso=(map) |#default=Map Link Error}}| {{#iferror:{{#expr:+1}}||}}{{#switch:sr

 |bm=
 |si=
 |db=
 |on=
 |bs5=
 |bs5c=  

}}{{#switch:beyond |bm|mw|ob|si|sr|db|beyond|bs5|bs5c|eso=(map) |#default=Map Link Error}}}}

  • {{#if:|{{#ifeq:|{{{modpage}}}||}}}}{{#ifeq:Morvunskar|none||}}{{#if:|}}{{#if:SR-mapicon-Fort.png|SR-mapicon-Fort.png }}{{#if:|Morvunskar|Morvunskar}}{{ {{{mod}}} }}{{#if:A small fort southwest of, and overlooking, Windhelm.| — {{#if:|A small fort southwest of, and overlooking, Windhelm.|A small fort southwest of, and overlooking, Windhelm.}}}}{{#if:{{#iferror:{{#expr:+1}}||}}{{#switch:sr
 |bm=
 |si=
 |db=
 |on=
 |bs5=
 |bs5c=  

}}{{#switch:beyond |bm|mw|ob|si|sr|db|beyond|bs5|bs5c|eso=(map) |#default=Map Link Error}}| {{#iferror:{{#expr:+1}}||}}{{#switch:sr

 |bm=
 |si=
 |db=
 |on=
 |bs5=
 |bs5c=  

}}{{#switch:beyond |bm|mw|ob|si|sr|db|beyond|bs5|bs5c|eso=(map) |#default=Map Link Error}}}}

  • {{#if:|{{#ifeq:|{{{modpage}}}||}}}}{{#ifeq:Refugees' Rest|none||}}{{#if:|}}{{#if:SR-mapicon-Imperial Tower.png|SR-mapicon-Imperial Tower.png }}{{#if:|Refugees' Rest|Refugees' Rest}}{{ {{{mod}}} }}{{#if:A small ruined tower east of Windhelm and close to the Morrowind border containing leveled animals.| — {{#if:|A small ruined tower east of Windhelm and close to the Morrowind border containing leveled animals.|A small ruined tower east of Windhelm and close to the Morrowind border containing leveled animals.}}}}{{#if:{{#iferror:{{#expr:+1}}||}}{{#switch:sr
 |bm=
 |si=
 |db=
 |on=
 |bs5=
 |bs5c=  

}}{{#switch:beyond |bm|mw|ob|si|sr|db|beyond|bs5|bs5c|eso=Rest|&centeron=Refugees%27+Rest}}{{#if:|&x={{{x}}}&y=}}{{#if:|&search=%7B%7B%7Bsearch%7D%7D%7D}}{{#if:|&zoom={{{zoom}}}&legacy=true}}{{#if:|&zoom={{{newzoom}}}}}|?{{#sub:{{#if:|&world=}}{{#if:Refugees' Rest|&centeron=Refugees%27+Rest}}{{#if:|&x={{{x}}}&y=}}{{#if:|&search=%7B%7B%7Bsearch%7D%7D%7D}}{{#if:|&zoom={{{zoom}}}&legacy=true}}{{#if:|&zoom={{{newzoom}}}}}|1}}}} (map) |#default=Map Link Error}}| {{#iferror:{{#expr:+1}}||}}{{#switch:sr

 |bm=
 |si=
 |db=
 |on=
 |bs5=
 |bs5c=  

}}{{#switch:beyond |bm|mw|ob|si|sr|db|beyond|bs5|bs5c|eso=Rest|&centeron=Refugees%27+Rest}}{{#if:|&x={{{x}}}&y=}}{{#if:|&search=%7B%7B%7Bsearch%7D%7D%7D}}{{#if:|&zoom={{{zoom}}}&legacy=true}}{{#if:|&zoom={{{newzoom}}}}}|?{{#sub:{{#if:|&world=}}{{#if:Refugees' Rest|&centeron=Refugees%27+Rest}}{{#if:|&x={{{x}}}&y=}}{{#if:|&search=%7B%7B%7Bsearch%7D%7D%7D}}{{#if:|&zoom={{{zoom}}}&legacy=true}}{{#if:|&zoom={{{newzoom}}}}}|1}}}} (map) |#default=Map Link Error}}}}

Standing Stones and Daedric Shrines[edit]

  • {{#if:|{{#ifeq:|{{{modpage}}}||}}}}{{#ifeq:The Atronach Stone|none||}}{{#if:|}}{{#if:SR-mapicon-Doomstone.png|SR-mapicon-Doomstone.png }}{{#if:|The Atronach Stone|The Atronach Stone}}{{ {{{mod}}} }}{{#if:one of the thirteen Standing Stones scattered across Skyrim.| — {{#if:|one of the thirteen Standing Stones scattered across Skyrim.|one of the thirteen Standing Stones scattered across Skyrim.}}}}{{#if:{{#iferror:{{#expr:+1}}||}}{{#switch:sr
 |bm=
 |si=
 |db=
 |on=
 |bs5=
 |bs5c=  

}}{{#switch:beyond |bm|mw|ob|si|sr|db|beyond|bs5|bs5c|eso=Atronach Stone|&centeron=The+Atronach+Stone}}{{#if:|&x={{{x}}}&y=}}{{#if:|&search=%7B%7B%7Bsearch%7D%7D%7D}}{{#if:|&zoom={{{zoom}}}&legacy=true}}{{#if:|&zoom={{{newzoom}}}}}|?{{#sub:{{#if:|&world=}}{{#if:The Atronach Stone|&centeron=The+Atronach+Stone}}{{#if:|&x={{{x}}}&y=}}{{#if:|&search=%7B%7B%7Bsearch%7D%7D%7D}}{{#if:|&zoom={{{zoom}}}&legacy=true}}{{#if:|&zoom={{{newzoom}}}}}|1}}}} (map) |#default=Map Link Error}}| {{#iferror:{{#expr:+1}}||}}{{#switch:sr

 |bm=
 |si=
 |db=
 |on=
 |bs5=
 |bs5c=  

}}{{#switch:beyond |bm|mw|ob|si|sr|db|beyond|bs5|bs5c|eso=Atronach Stone|&centeron=The+Atronach+Stone}}{{#if:|&x={{{x}}}&y=}}{{#if:|&search=%7B%7B%7Bsearch%7D%7D%7D}}{{#if:|&zoom={{{zoom}}}&legacy=true}}{{#if:|&zoom={{{newzoom}}}}}|?{{#sub:{{#if:|&world=}}{{#if:The Atronach Stone|&centeron=The+Atronach+Stone}}{{#if:|&x={{{x}}}&y=}}{{#if:|&search=%7B%7B%7Bsearch%7D%7D%7D}}{{#if:|&zoom={{{zoom}}}&legacy=true}}{{#if:|&zoom={{{newzoom}}}}}|1}}}} (map) |#default=Map Link Error}}}}

  • {{#if:|{{#ifeq:|{{{modpage}}}||}}}}{{#ifeq:Sacellum of Boethiah|none||}}{{#if:|}}{{#if:SR-mapicon-Shrine.png|SR-mapicon-Shrine.png }}{{#if:|Sacellum of Boethiah|Sacellum of Boethiah}}{{ {{{mod}}} }}{{#if:the shrine to the Daedric Prince Boethiah.| — {{#if:|the shrine to the Daedric Prince Boethiah.|the shrine to the Daedric Prince Boethiah.}}}}{{#if:{{#iferror:{{#expr:+1}}||}}{{#switch:sr
 |bm=
 |si=
 |db=
 |on=
 |bs5=
 |bs5c=  

}}{{#switch:beyond |bm|mw|ob|si|sr|db|beyond|bs5|bs5c|eso=of Boethiah|&centeron=Sacellum+of+Boethiah}}{{#if:|&x={{{x}}}&y=}}{{#if:|&search=%7B%7B%7Bsearch%7D%7D%7D}}{{#if:|&zoom={{{zoom}}}&legacy=true}}{{#if:|&zoom={{{newzoom}}}}}|?{{#sub:{{#if:|&world=}}{{#if:Sacellum of Boethiah|&centeron=Sacellum+of+Boethiah}}{{#if:|&x={{{x}}}&y=}}{{#if:|&search=%7B%7B%7Bsearch%7D%7D%7D}}{{#if:|&zoom={{{zoom}}}&legacy=true}}{{#if:|&zoom={{{newzoom}}}}}|1}}}} (map) |#default=Map Link Error}}| {{#iferror:{{#expr:+1}}||}}{{#switch:sr

 |bm=
 |si=
 |db=
 |on=
 |bs5=
 |bs5c=  

}}{{#switch:beyond |bm|mw|ob|si|sr|db|beyond|bs5|bs5c|eso=of Boethiah|&centeron=Sacellum+of+Boethiah}}{{#if:|&x={{{x}}}&y=}}{{#if:|&search=%7B%7B%7Bsearch%7D%7D%7D}}{{#if:|&zoom={{{zoom}}}&legacy=true}}{{#if:|&zoom={{{newzoom}}}}}|?{{#sub:{{#if:|&world=}}{{#if:Sacellum of Boethiah|&centeron=Sacellum+of+Boethiah}}{{#if:|&x={{{x}}}&y=}}{{#if:|&search=%7B%7B%7Bsearch%7D%7D%7D}}{{#if:|&zoom={{{zoom}}}&legacy=true}}{{#if:|&zoom={{{newzoom}}}}}|1}}}} (map) |#default=Map Link Error}}}}

Landmarks, including Bodies of Water, Clearings, Ships and Shipwrecks[edit]

  • {{#if:|{{#ifeq:|{{{modpage}}}||}}}}{{#ifeq:Darkwater River|none||}}{{#if:|}}{{#if:|[[File:|20x20px]] }}{{#if:|Darkwater River|Darkwater River}}{{ {{{mod}}} }}{{#if:A river connecting Lake Geir to the White River.| — {{#if:|A river connecting Lake Geir to the White River.|A river connecting Lake Geir to the White River.}}}}{{#if:{{#iferror:{{#expr:+1}}||}}{{#switch:sr
 |bm=
 |si=
 |db=
 |on=
 |bs5=
 |bs5c=  

}}{{#switch:beyond |bm|mw|ob|si|sr|db|beyond|bs5|bs5c|eso=River|&centeron=Darkwater+River}}{{#if:|&x={{{x}}}&y=}}{{#if:|&search=%7B%7B%7Bsearch%7D%7D%7D}}{{#if:|&zoom={{{zoom}}}&legacy=true}}{{#if:|&zoom={{{newzoom}}}}}|?{{#sub:{{#if:|&world=}}{{#if:Darkwater River|&centeron=Darkwater+River}}{{#if:|&x={{{x}}}&y=}}{{#if:|&search=%7B%7B%7Bsearch%7D%7D%7D}}{{#if:|&zoom={{{zoom}}}&legacy=true}}{{#if:|&zoom={{{newzoom}}}}}|1}}}} (map) |#default=Map Link Error}}| {{#iferror:{{#expr:+1}}||}}{{#switch:sr

 |bm=
 |si=
 |db=
 |on=
 |bs5=
 |bs5c=  

}}{{#switch:beyond |bm|mw|ob|si|sr|db|beyond|bs5|bs5c|eso=River|&centeron=Darkwater+River}}{{#if:|&x={{{x}}}&y=}}{{#if:|&search=%7B%7B%7Bsearch%7D%7D%7D}}{{#if:|&zoom={{{zoom}}}&legacy=true}}{{#if:|&zoom={{{newzoom}}}}}|?{{#sub:{{#if:|&world=}}{{#if:Darkwater River|&centeron=Darkwater+River}}{{#if:|&x={{{x}}}&y=}}{{#if:|&search=%7B%7B%7Bsearch%7D%7D%7D}}{{#if:|&zoom={{{zoom}}}&legacy=true}}{{#if:|&zoom={{{newzoom}}}}}|1}}}} (map) |#default=Map Link Error}}}}

  • {{#if:|{{#ifeq:|{{{modpage}}}||}}}}{{#ifeq:Dunmeth Pass|none||}}{{#if:|}}{{#if:|[[File:|20x20px]] }}{{#if:|Dunmeth Pass|Dunmeth Pass}}{{ {{{mod}}} }}{{#if:a mountain pass and one of the few traversable roads through the Velothi Mountains between northwest Morrowind and northeast Skyrim.| — {{#if:|a mountain pass and one of the few traversable roads through the Velothi Mountains between northwest Morrowind and northeast Skyrim.|a mountain pass and one of the few traversable roads through the Velothi Mountains between northwest Morrowind and northeast Skyrim.}}}}{{#if:{{#iferror:{{#expr:+1}}||}}{{#switch:sr
 |bm=
 |si=
 |db=
 |on=
 |bs5=
 |bs5c=  

}}{{#switch:beyond |bm|mw|ob|si|sr|db|beyond|bs5|bs5c|eso=Pass|&centeron=Dunmeth+Pass}}{{#if:|&x={{{x}}}&y=}}{{#if:|&search=%7B%7B%7Bsearch%7D%7D%7D}}{{#if:|&zoom={{{zoom}}}&legacy=true}}{{#if:|&zoom={{{newzoom}}}}}|?{{#sub:{{#if:|&world=}}{{#if:Dunmeth Pass|&centeron=Dunmeth+Pass}}{{#if:|&x={{{x}}}&y=}}{{#if:|&search=%7B%7B%7Bsearch%7D%7D%7D}}{{#if:|&zoom={{{zoom}}}&legacy=true}}{{#if:|&zoom={{{newzoom}}}}}|1}}}} (map) |#default=Map Link Error}}| {{#iferror:{{#expr:+1}}||}}{{#switch:sr

 |bm=
 |si=
 |db=
 |on=
 |bs5=
 |bs5c=  

}}{{#switch:beyond |bm|mw|ob|si|sr|db|beyond|bs5|bs5c|eso=Pass|&centeron=Dunmeth+Pass}}{{#if:|&x={{{x}}}&y=}}{{#if:|&search=%7B%7B%7Bsearch%7D%7D%7D}}{{#if:|&zoom={{{zoom}}}&legacy=true}}{{#if:|&zoom={{{newzoom}}}}}|?{{#sub:{{#if:|&world=}}{{#if:Dunmeth Pass|&centeron=Dunmeth+Pass}}{{#if:|&x={{{x}}}&y=}}{{#if:|&search=%7B%7B%7Bsearch%7D%7D%7D}}{{#if:|&zoom={{{zoom}}}&legacy=true}}{{#if:|&zoom={{{newzoom}}}}}|1}}}} (map) |#default=Map Link Error}}}}

  • {{#if:|{{#ifeq:|{{{modpage}}}||}}}}{{#ifeq:Mara's Eye Pond|none||}}{{#if:|}}{{#if:SR-mapicon-Clearing.png|SR-mapicon-Clearing.png }}{{#if:|Mara's Eye Pond|Mara's Eye Pond}}{{ {{{mod}}} }}{{#if:a small lake due east of Gallows Rock.| — {{#if:|a small lake due east of Gallows Rock.|a small lake due east of Gallows Rock.}}}}{{#if:{{#iferror:{{#expr:+1}}||}}{{#switch:sr
 |bm=
 |si=
 |db=
 |on=
 |bs5=
 |bs5c=  

}}{{#switch:beyond |bm|mw|ob|si|sr|db|beyond|bs5|bs5c|eso=Eye Pond|&centeron=Mara%27s+Eye+Pond}}{{#if:|&x={{{x}}}&y=}}{{#if:|&search=%7B%7B%7Bsearch%7D%7D%7D}}{{#if:|&zoom={{{zoom}}}&legacy=true}}{{#if:|&zoom={{{newzoom}}}}}|?{{#sub:{{#if:|&world=}}{{#if:Mara's Eye Pond|&centeron=Mara%27s+Eye+Pond}}{{#if:|&x={{{x}}}&y=}}{{#if:|&search=%7B%7B%7Bsearch%7D%7D%7D}}{{#if:|&zoom={{{zoom}}}&legacy=true}}{{#if:|&zoom={{{newzoom}}}}}|1}}}} (map) |#default=Map Link Error}}| {{#iferror:{{#expr:+1}}||}}{{#switch:sr

 |bm=
 |si=
 |db=
 |on=
 |bs5=
 |bs5c=  

}}{{#switch:beyond |bm|mw|ob|si|sr|db|beyond|bs5|bs5c|eso=Eye Pond|&centeron=Mara%27s+Eye+Pond}}{{#if:|&x={{{x}}}&y=}}{{#if:|&search=%7B%7B%7Bsearch%7D%7D%7D}}{{#if:|&zoom={{{zoom}}}&legacy=true}}{{#if:|&zoom={{{newzoom}}}}}|?{{#sub:{{#if:|&world=}}{{#if:Mara's Eye Pond|&centeron=Mara%27s+Eye+Pond}}{{#if:|&x={{{x}}}&y=}}{{#if:|&search=%7B%7B%7Bsearch%7D%7D%7D}}{{#if:|&zoom={{{zoom}}}&legacy=true}}{{#if:|&zoom={{{newzoom}}}}}|1}}}} (map) |#default=Map Link Error}}}}

  • {{#if:|{{#ifeq:|{{{modpage}}}||}}}}{{#ifeq:River Yorgrim|none||}}{{#if:|}}{{#if:|[[File:|20x20px]] }}{{#if:|River Yorgrim|River Yorgrim}}{{ {{{mod}}} }}{{#if:A river flowing from Lake Yorgrim to Windhelm.| — {{#if:|A river flowing from Lake Yorgrim to Windhelm.|A river flowing from Lake Yorgrim to Windhelm.}}}}{{#if:{{#iferror:{{#expr:+1}}||}}{{#switch:sr
 |bm=
 |si=
 |db=
 |on=
 |bs5=
 |bs5c=  

}}{{#switch:beyond |bm|mw|ob|si|sr|db|beyond|bs5|bs5c|eso=Yorgrim|&centeron=River+Yorgrim}}{{#if:|&x={{{x}}}&y=}}{{#if:|&search=%7B%7B%7Bsearch%7D%7D%7D}}{{#if:|&zoom={{{zoom}}}&legacy=true}}{{#if:|&zoom={{{newzoom}}}}}|?{{#sub:{{#if:|&world=}}{{#if:River Yorgrim|&centeron=River+Yorgrim}}{{#if:|&x={{{x}}}&y=}}{{#if:|&search=%7B%7B%7Bsearch%7D%7D%7D}}{{#if:|&zoom={{{zoom}}}&legacy=true}}{{#if:|&zoom={{{newzoom}}}}}|1}}}} (map) |#default=Map Link Error}}| {{#iferror:{{#expr:+1}}||}}{{#switch:sr

 |bm=
 |si=
 |db=
 |on=
 |bs5=
 |bs5c=  

}}{{#switch:beyond |bm|mw|ob|si|sr|db|beyond|bs5|bs5c|eso=Yorgrim|&centeron=River+Yorgrim}}{{#if:|&x={{{x}}}&y=}}{{#if:|&search=%7B%7B%7Bsearch%7D%7D%7D}}{{#if:|&zoom={{{zoom}}}&legacy=true}}{{#if:|&zoom={{{newzoom}}}}}|?{{#sub:{{#if:|&world=}}{{#if:River Yorgrim|&centeron=River+Yorgrim}}{{#if:|&x={{{x}}}&y=}}{{#if:|&search=%7B%7B%7Bsearch%7D%7D%7D}}{{#if:|&zoom={{{zoom}}}&legacy=true}}{{#if:|&zoom={{{newzoom}}}}}|1}}}} (map) |#default=Map Link Error}}}}

  • {{#if:|{{#ifeq:|{{{modpage}}}||}}}}{{#ifeq:Sea of Ghosts|none||}}{{#if:|}}{{#if:|[[File:|20x20px]] }}{{#if:|Sea of Ghosts|Sea of Ghosts}}{{ {{{mod}}} }}{{#if:A vast ocean to the north of Skyrim.| — {{#if:|A vast ocean to the north of Skyrim.|A vast ocean to the north of Skyrim.}}}}{{#if:{{#iferror:{{#expr:+1}}||}}{{#switch:sr
 |bm=
 |si=
 |db=
 |on=
 |bs5=
 |bs5c=  

}}{{#switch:beyond |bm|mw|ob|si|sr|db|beyond|bs5|bs5c|eso=of Ghosts|&centeron=Sea+of+Ghosts}}{{#if:|&x={{{x}}}&y=}}{{#if:|&search=%7B%7B%7Bsearch%7D%7D%7D}}{{#if:|&zoom={{{zoom}}}&legacy=true}}{{#if:|&zoom={{{newzoom}}}}}|?{{#sub:{{#if:|&world=}}{{#if:Sea of Ghosts|&centeron=Sea+of+Ghosts}}{{#if:|&x={{{x}}}&y=}}{{#if:|&search=%7B%7B%7Bsearch%7D%7D%7D}}{{#if:|&zoom={{{zoom}}}&legacy=true}}{{#if:|&zoom={{{newzoom}}}}}|1}}}} (map) |#default=Map Link Error}}| {{#iferror:{{#expr:+1}}||}}{{#switch:sr

 |bm=
 |si=
 |db=
 |on=
 |bs5=
 |bs5c=  

}}{{#switch:beyond |bm|mw|ob|si|sr|db|beyond|bs5|bs5c|eso=of Ghosts|&centeron=Sea+of+Ghosts}}{{#if:|&x={{{x}}}&y=}}{{#if:|&search=%7B%7B%7Bsearch%7D%7D%7D}}{{#if:|&zoom={{{zoom}}}&legacy=true}}{{#if:|&zoom={{{newzoom}}}}}|?{{#sub:{{#if:|&world=}}{{#if:Sea of Ghosts|&centeron=Sea+of+Ghosts}}{{#if:|&x={{{x}}}&y=}}{{#if:|&search=%7B%7B%7Bsearch%7D%7D%7D}}{{#if:|&zoom={{{zoom}}}&legacy=true}}{{#if:|&zoom={{{newzoom}}}}}|1}}}} (map) |#default=Map Link Error}}}}

  • {{#if:|{{#ifeq:|{{{modpage}}}||}}}}{{#ifeq:Velothi Mountains|none||}}{{#if:|}}{{#if:|[[File:|20x20px]] }}{{#if:|Velothi Mountains|Velothi Mountains}}{{ {{{mod}}} }}{{#if:a mountain range that stretches along the eastern border of Skyrim.| — {{#if:|a mountain range that stretches along the eastern border of Skyrim.|a mountain range that stretches along the eastern border of Skyrim.}}}}{{#if:{{#iferror:{{#expr:+1}}||}}{{#switch:sr
 |bm=
 |si=
 |db=
 |on=
 |bs5=
 |bs5c=  

}}{{#switch:beyond |bm|mw|ob|si|sr|db|beyond|bs5|bs5c|eso=Mountains|&centeron=Velothi+Mountains}}{{#if:|&x={{{x}}}&y=}}{{#if:|&search=%7B%7B%7Bsearch%7D%7D%7D}}{{#if:|&zoom={{{zoom}}}&legacy=true}}{{#if:|&zoom={{{newzoom}}}}}|?{{#sub:{{#if:|&world=}}{{#if:Velothi Mountains|&centeron=Velothi+Mountains}}{{#if:|&x={{{x}}}&y=}}{{#if:|&search=%7B%7B%7Bsearch%7D%7D%7D}}{{#if:|&zoom={{{zoom}}}&legacy=true}}{{#if:|&zoom={{{newzoom}}}}}|1}}}} (map) |#default=Map Link Error}}| {{#iferror:{{#expr:+1}}||}}{{#switch:sr

 |bm=
 |si=
 |db=
 |on=
 |bs5=
 |bs5c=  

}}{{#switch:beyond |bm|mw|ob|si|sr|db|beyond|bs5|bs5c|eso=Mountains|&centeron=Velothi+Mountains}}{{#if:|&x={{{x}}}&y=}}{{#if:|&search=%7B%7B%7Bsearch%7D%7D%7D}}{{#if:|&zoom={{{zoom}}}&legacy=true}}{{#if:|&zoom={{{newzoom}}}}}|?{{#sub:{{#if:|&world=}}{{#if:Velothi Mountains|&centeron=Velothi+Mountains}}{{#if:|&x={{{x}}}&y=}}{{#if:|&search=%7B%7B%7Bsearch%7D%7D%7D}}{{#if:|&zoom={{{zoom}}}&legacy=true}}{{#if:|&zoom={{{newzoom}}}}}|1}}}} (map) |#default=Map Link Error}}}}

  • {{#if:|{{#ifeq:|{{{modpage}}}||}}}}{{#ifeq:White River|none||}}{{#if:|}}{{#if:|[[File:|20x20px]] }}{{#if:|White River|White River}}{{ {{{mod}}} }}{{#if:The longest river in Skyrim, stretching from the south of the province to the northeast corner.| — {{#if:|The longest river in Skyrim, stretching from the south of the province to the northeast corner.|The longest river in Skyrim, stretching from the south of the province to the northeast corner.}}}}{{#if:{{#iferror:{{#expr:+1}}||}}{{#switch:sr
 |bm=
 |si=
 |db=
 |on=
 |bs5=
 |bs5c=  

}}{{#switch:beyond |bm|mw|ob|si|sr|db|beyond|bs5|bs5c|eso=River|&centeron=White+River}}{{#if:|&x={{{x}}}&y=}}{{#if:|&search=%7B%7B%7Bsearch%7D%7D%7D}}{{#if:|&zoom={{{zoom}}}&legacy=true}}{{#if:|&zoom={{{newzoom}}}}}|?{{#sub:{{#if:|&world=}}{{#if:White River|&centeron=White+River}}{{#if:|&x={{{x}}}&y=}}{{#if:|&search=%7B%7B%7Bsearch%7D%7D%7D}}{{#if:|&zoom={{{zoom}}}&legacy=true}}{{#if:|&zoom={{{newzoom}}}}}|1}}}} (map) |#default=Map Link Error}}| {{#iferror:{{#expr:+1}}||}}{{#switch:sr

 |bm=
 |si=
 |db=
 |on=
 |bs5=
 |bs5c=  

}}{{#switch:beyond |bm|mw|ob|si|sr|db|beyond|bs5|bs5c|eso=River|&centeron=White+River}}{{#if:|&x={{{x}}}&y=}}{{#if:|&search=%7B%7B%7Bsearch%7D%7D%7D}}{{#if:|&zoom={{{zoom}}}&legacy=true}}{{#if:|&zoom={{{newzoom}}}}}|?{{#sub:{{#if:|&world=}}{{#if:White River|&centeron=White+River}}{{#if:|&x={{{x}}}&y=}}{{#if:|&search=%7B%7B%7Bsearch%7D%7D%7D}}{{#if:|&zoom={{{zoom}}}&legacy=true}}{{#if:|&zoom={{{newzoom}}}}}|1}}}} (map) |#default=Map Link Error}}}}

  • {{#if:|{{#ifeq:|{{{modpage}}}||}}}}{{#ifeq:Witchmist Grove|none||}}{{#if:|}}{{#if:SR-mapicon-Grove.png|SR-mapicon-Grove.png }}{{#if:|Witchmist Grove|Witchmist Grove}}{{ {{{mod}}} }}{{#if:a small shack north of Bonestrewn Crest and south of Kynesgrove.| — {{#if:|a small shack north of Bonestrewn Crest and south of Kynesgrove.|a small shack north of Bonestrewn Crest and south of Kynesgrove.}}}}{{#if:{{#iferror:{{#expr:+1}}||}}{{#switch:sr
 |bm=
 |si=
 |db=
 |on=
 |bs5=
 |bs5c=  

}}{{#switch:beyond |bm|mw|ob|si|sr|db|beyond|bs5|bs5c|eso=Grove|&centeron=Witchmist+Grove}}{{#if:|&x={{{x}}}&y=}}{{#if:|&search=%7B%7B%7Bsearch%7D%7D%7D}}{{#if:|&zoom={{{zoom}}}&legacy=true}}{{#if:|&zoom={{{newzoom}}}}}|?{{#sub:{{#if:|&world=}}{{#if:Witchmist Grove|&centeron=Witchmist+Grove}}{{#if:|&x={{{x}}}&y=}}{{#if:|&search=%7B%7B%7Bsearch%7D%7D%7D}}{{#if:|&zoom={{{zoom}}}&legacy=true}}{{#if:|&zoom={{{newzoom}}}}}|1}}}} (map) |#default=Map Link Error}}| {{#iferror:{{#expr:+1}}||}}{{#switch:sr

 |bm=
 |si=
 |db=
 |on=
 |bs5=
 |bs5c=  

}}{{#switch:beyond |bm|mw|ob|si|sr|db|beyond|bs5|bs5c|eso=Grove|&centeron=Witchmist+Grove}}{{#if:|&x={{{x}}}&y=}}{{#if:|&search=%7B%7B%7Bsearch%7D%7D%7D}}{{#if:|&zoom={{{zoom}}}&legacy=true}}{{#if:|&zoom={{{newzoom}}}}}|?{{#sub:{{#if:|&world=}}{{#if:Witchmist Grove|&centeron=Witchmist+Grove}}{{#if:|&x={{{x}}}&y=}}{{#if:|&search=%7B%7B%7Bsearch%7D%7D%7D}}{{#if:|&zoom={{{zoom}}}&legacy=true}}{{#if:|&zoom={{{newzoom}}}}}|1}}}} (map) |#default=Map Link Error}}}}

Unmarked Places[edit]

The dragon mound southwest of Kynesgrove, with Windhelm and Morvunskar visible in the background

Eastmarch Quests[edit]

All the quests that are started in or are related to Eastmarch (except for radiant quests begun in other holds) are listed here:

Main Quest[edit]

  • {{#if:|{{#ifeq:|{{{modpage}}}||}}}}{{#if:|Repeatable }}{{#ifeq:|yes
 |Required for Cadwell's Almanac }}{{#if:
 |[[File:|bottom|20px]]}}{{#if:|}}A Blade in the Dark{{#if:Prove you are Dragonborn to Delphine by slaying the dragon Sahloknir.|: Prove you are Dragonborn to Delphine by slaying the dragon Sahloknir.}}{{#if:||{{#ifeq:{{{radiant}}}|yes| (radiant)}}}}{{#if:| (disabled{{#switch:{{{disabled}}}|y|yes=| since }})}}
  • {{#if:|{{#ifeq:|{{{modpage}}}||}}}}{{#if:|Repeatable }}{{#ifeq:|yes
 |Required for Cadwell's Almanac }}{{#if:
 |[[File:|bottom|20px]]}}{{#if:|}}Season Unending{{#if:Enforce a ceasefire to secure Dragonsreach.|: Enforce a ceasefire to secure Dragonsreach.}}{{#if:||{{#ifeq:{{{radiant}}}|yes| (radiant)}}}}{{#if:| (disabled{{#switch:{{{disabled}}}|y|yes=| since }})}}

Imperial Legion Civil War Quests[edit]

  • {{#if:|{{#ifeq:|{{{modpage}}}||}}}}{{#if:|Repeatable }}{{#ifeq:|yes
 |Required for Cadwell's Almanac }}{{#if:
 |[[File:|bottom|20px]]}}{{#if:|}}Reunification of Skyrim{{#if:Reunite Skyrim under the leadership of the Empire.|: Reunite Skyrim under the leadership of the Empire.}}{{#if:||{{#ifeq:yes|yes| (radiant)}}}}{{#if:| (disabled{{#switch:{{{disabled}}}|y|yes=| since }})}}
  • {{#if:|{{#ifeq:|{{{modpage}}}||}}}}{{#if:|Repeatable }}{{#ifeq:|yes
 |Required for Cadwell's Almanac }}{{#if:
 |[[File:|bottom|20px]]}}{{#if:|}}The Battle for Fort Amol{{#if:Prepare for the final assault on Windhelm by taking Fort Amol for the Imperials.|: Prepare for the final assault on Windhelm by taking Fort Amol for the Imperials.}}{{#if:||{{#ifeq:yes|yes| (radiant)}}}}{{#if:| (disabled{{#switch:{{{disabled}}}|y|yes=| since }})}}
  • {{#if:|{{#ifeq:|{{{modpage}}}||}}}}{{#if:|Repeatable }}{{#ifeq:|yes
 |Required for Cadwell's Almanac }}{{#if:
 |[[File:|bottom|20px]]}}{{#if:|}}Battle for Windhelm{{#if:Conquer the Stormcloak capital and bring Ulfric to justice!|: Conquer the Stormcloak capital and bring Ulfric to justice!}}{{#if:||{{#ifeq:{{{radiant}}}|yes| (radiant)}}}}{{#if:| (disabled{{#switch:{{{disabled}}}|y|yes=| since }})}}

Stormcloaks Civil War Quests[edit]

  • {{#if:|{{#ifeq:|{{{modpage}}}||}}}}{{#if:|Repeatable }}{{#ifeq:|yes
 |Required for Cadwell's Almanac }}{{#if:
 |[[File:|bottom|20px]]}}{{#if:|}}The Jagged Crown{{#if:Find this crown for Ulfric Stormcloak.|: Find this crown for Ulfric Stormcloak.}}{{#if:||{{#ifeq:{{{radiant}}}|yes| (radiant)}}}}{{#if:| (disabled{{#switch:{{{disabled}}}|y|yes=| since }})}}
  • {{#if:|{{#ifeq:|{{{modpage}}}||}}}}{{#if:|Repeatable }}{{#ifeq:|yes
 |Required for Cadwell's Almanac }}{{#if:
 |[[File:|bottom|20px]]}}{{#if:|}}Message to Whiterun{{#if:Deliver an axe to the Jarl of Whiterun.|: Deliver an axe to the Jarl of Whiterun.}}{{#if:||{{#ifeq:{{{radiant}}}|yes| (radiant)}}}}{{#if:| (disabled{{#switch:{{{disabled}}}|y|yes=| since }})}}
  • {{#if:|{{#ifeq:|{{{modpage}}}||}}}}{{#if:|Repeatable }}{{#ifeq:|yes
 |Required for Cadwell's Almanac }}{{#if:
 |[[File:|bottom|20px]]}}{{#if:|}}Battle for Whiterun{{#if:Take Whiterun in the name of the Stormcloaks.|: Take Whiterun in the name of the Stormcloaks.}}{{#if:||{{#ifeq:yes|yes| (radiant)}}}}{{#if:| (disabled{{#switch:{{{disabled}}}|y|yes=| since }})}}
  • {{#if:|{{#ifeq:|{{{modpage}}}||}}}}{{#if:|Repeatable }}{{#ifeq:|yes
 |Required for Cadwell's Almanac }}{{#if:
 |[[File:|bottom|20px]]}}{{#if:|}}Liberation of Skyrim{{#if:Drive the Imperials from Skyrim.|: Drive the Imperials from Skyrim.}}{{#if:||{{#ifeq:yes|yes| (radiant)}}}}{{#if:| (disabled{{#switch:{{{disabled}}}|y|yes=| since }})}}

Daedric Quests[edit]

  • {{#if:|{{#ifeq:|{{{modpage}}}||}}}}{{#if:|Repeatable }}{{#ifeq:|yes
 |Required for Cadwell's Almanac }}{{#if:
 |[[File:|bottom|20px]]}}{{#if:|}}Boethiah's Calling{{#if:Become Boethiah's new champion.|: Become Boethiah's new champion.}}{{#if:||{{#ifeq:{{{radiant}}}|yes| (radiant)}}}}{{#if:| (disabled{{#switch:{{{disabled}}}|y|yes=| since }})}}

Dark Brotherhood[edit]

  • {{#if:|{{#ifeq:|{{{modpage}}}||}}}}{{#if:|Repeatable }}{{#ifeq:|yes
 |Required for Cadwell's Almanac }}{{#if:
 |[[File:|bottom|20px]]}}{{#if:|}}Innocence Lost{{#if:Help an orphaned child avoid being returned to a sadistic caretaker.|: Help an orphaned child avoid being returned to a sadistic caretaker.}}{{#if:||{{#ifeq:{{{radiant}}}|yes| (radiant)}}}}{{#if:| (disabled{{#switch:{{{disabled}}}|y|yes=| since }})}}
  • {{#if:|{{#ifeq:|{{{modpage}}}||}}}}{{#if:|Repeatable }}{{#ifeq:|yes
 |Required for Cadwell's Almanac }}{{#if:
 |[[File:|bottom|20px]]}}{{#if:|}}Mourning Never Comes{{#if:Help Muiri get her revenge.|: Help Muiri get her revenge.}}{{#if:||{{#ifeq:{{{radiant}}}|yes| (radiant)}}}}{{#if:| (disabled{{#switch:{{{disabled}}}|y|yes=| since }})}}
  • {{#if:|{{#ifeq:|{{{modpage}}}||}}}}{{#if:|Repeatable }}{{#ifeq:|yes
 |Required for Cadwell's Almanac }}{{#if:
 |[[File:|bottom|20px]]}}{{#if:|}}Kill Ma'randru-jo{{#if:Assassinate Ma'randru-jo to complete a Dark Brotherhood contract.|: Assassinate Ma'randru-jo to complete a Dark Brotherhood contract.}}{{#if:||{{#ifeq:{{{radiant}}}|yes| (radiant)}}}}{{#if:| (disabled{{#switch:{{{disabled}}}|y|yes=| since }})}}

College of Winterhold[edit]

  • {{#if:|{{#ifeq:|{{{modpage}}}||}}}}{{#if:|Repeatable }}{{#ifeq:|yes
 |Required for Cadwell's Almanac }}{{#if:
 |[[File:|bottom|20px]]}}{{#if:|}}Revealing the Unseen{{#if:Learn the location of the Staff of Magnus.|: Learn the location of the Staff of Magnus.}}{{#if:||{{#ifeq:{{{radiant}}}|yes| (radiant)}}}}{{#if:| (disabled{{#switch:{{{disabled}}}|y|yes=| since }})}}

Thieves Guild[edit]

  • {{#if:|{{#ifeq:|{{{modpage}}}||}}}}{{#if:|Repeatable }}{{#ifeq:|yes
 |Required for Cadwell's Almanac }}{{#if:
 |[[File:|bottom|20px]]}}{{#if:|}}Summerset Shadows{{#if:Remove a rival guild from the picture.|: Remove a rival guild from the picture.}}{{#if:||{{#ifeq:{{{radiant}}}|yes| (radiant)}}}}{{#if:| (disabled{{#switch:{{{disabled}}}|y|yes=| since }})}}

Companions[edit]

  • {{#if:|{{#ifeq:|{{{modpage}}}||}}}}{{#if:|Repeatable }}{{#ifeq:|yes
 |Required for Cadwell's Almanac }}{{#if:
 |[[File:|bottom|20px]]}}{{#if:|}}The Silver Hand{{#if:Join the ranks of The Circle and clear Gallows Rock of werewolf hunters.|: Join the ranks of The Circle and clear Gallows Rock of werewolf hunters.}}{{#if:||{{#ifeq:{{{radiant}}}|yes| (radiant)}}}}{{#if:| (disabled{{#switch:{{{disabled}}}|y|yes=| since }})}}

Bards College[edit]

  • {{#if:|{{#ifeq:|{{{modpage}}}||}}}}{{#if:|Repeatable }}{{#ifeq:|yes
 |Required for Cadwell's Almanac }}{{#if:
 |[[File:|bottom|20px]]}}{{#if:|}}Finn's Lute{{#if:Return an invaluable lute to Inge Six Fingers.|: Return an invaluable lute to Inge Six Fingers.}}{{#if:||{{#ifeq:{{{radiant}}}|yes| (radiant)}}}}{{#if:| (disabled{{#switch:{{{disabled}}}|y|yes=| since }})}}

Side Quests including Divine Quests[edit]

  • {{#if:|{{#ifeq:|{{{modpage}}}||}}}}{{#if:|Repeatable }}{{#ifeq:|yes
 |Required for Cadwell's Almanac }}{{#if:
 |[[File:|bottom|20px]]}}{{#if:|}}The Blessings of Nature{{#if:Restore the Gildergreen for Danica Pure-Spring.|: Restore the Gildergreen for Danica Pure-Spring.}}{{#if:||{{#ifeq:{{{radiant}}}|yes| (radiant)}}}}{{#if:| (disabled{{#switch:{{{disabled}}}|y|yes=| since }})}}
  • {{#if:|{{#ifeq:|{{{modpage}}}||}}}}{{#if:|Repeatable }}{{#ifeq:|yes
 |Required for Cadwell's Almanac }}{{#if:
 |[[File:|bottom|20px]]}}{{#if:|}}Blood on the Ice{{#if:Windhelm is plagued by a shadowy killer.|: Windhelm is plagued by a shadowy killer.}}{{#if:||{{#ifeq:{{{radiant}}}|yes| (radiant)}}}}{{#if:| (disabled{{#switch:{{{disabled}}}|y|yes=| since }})}}
  • {{#if:|{{#ifeq:|{{{modpage}}}||}}}}{{#if:|Repeatable }}{{#ifeq:|yes
 |Required for Cadwell's Almanac }}{{#if:
 |[[File:|bottom|20px]]}}{{#if:|}}The White Phial{{#if:Retrieve a legendary artifact to fulfill an old alchemist's wish in Windhelm.|: Retrieve a legendary artifact to fulfill an old alchemist's wish in Windhelm.}}{{#if:||{{#ifeq:{{{radiant}}}|yes| (radiant)}}}}{{#if:| (disabled{{#switch:{{{disabled}}}|y|yes=| since }})}}
  • {{#if:|{{#ifeq:|{{{modpage}}}||}}}}{{#if:|Repeatable }}{{#ifeq:|yes
 |Required for Cadwell's Almanac }}{{#if:
 |[[File:|bottom|20px]]}}{{#if:|}}Repairing the Phial{{#if:Acquire the materials necessary to repair the White Phial.|: Acquire the materials necessary to repair the White Phial.}}{{#if:||{{#ifeq:{{{radiant}}}|yes| (radiant)}}}}{{#if:| (disabled{{#switch:{{{disabled}}}|y|yes=| since }})}}
  • {{#if:|{{#ifeq:|{{{modpage}}}||}}}}{{#if:|Repeatable }}{{#ifeq:|yes
 |Required for Cadwell's Almanac }}{{#if:
 |[[File:|bottom|20px]]}}{{#if:|}}Rise in the East{{#if:Help the East Empire Company take care of some pirates.|: Help the East Empire Company take care of some pirates.}}{{#if:||{{#ifeq:{{{radiant}}}|yes| (radiant)}}}}{{#if:| (disabled{{#switch:{{{disabled}}}|y|yes=| since }})}}

Dawnguard Quests[edit]

  • {{#if:Skyrim:Dawnguard|{{#ifeq:|Skyrim:Dawnguard||}}}}{{#if:|Repeatable }}{{#ifeq:|yes
 |Required for Cadwell's Almanac }}{{#if:
 |[[File:|bottom|20px]]}}{{#if:|}}Lost to the AgesDG{{#if:Search for the Dwemer's Aetherium Forge.|: Search for the Dwemer's Aetherium Forge.}}{{#if:||{{#ifeq:{{{radiant}}}|yes| (radiant)}}}}{{#if:| (disabled{{#switch:{{{disabled}}}|y|yes=| since }})}}

Dragonborn Quests[edit]

  • {{#if:Skyrim:Dragonborn|{{#ifeq:|Skyrim:Dragonborn||}}}}{{#if:|Repeatable }}{{#ifeq:|yes
 |Required for Cadwell's Almanac }}{{#if:
 |[[File:|bottom|20px]]}}{{#if:|}}DragonbornDB{{#if:Travel to the island of Solstheim to find out what's happening there.|: Travel to the island of Solstheim to find out what's happening there.}}{{#if:||{{#ifeq:{{{radiant}}}|yes| (radiant)}}}}{{#if:| (disabled{{#switch:{{{disabled}}}|y|yes=| since }})}}

Creation Club Quests[edit]

  • {{#if:Skyrim:Saints & Seducers|{{#ifeq:|Skyrim:Saints & Seducers||}}}}{{#if:|Repeatable }}{{#ifeq:|yes
 |Required for Cadwell's Almanac }}{{#if:
 |[[File:|bottom|20px]]}}{{#if:|}}Balance of PowerCC{{#if:Put a stop to two bandit gangs wielding strange otherworldly equipment.|: Put a stop to two bandit gangs wielding strange otherworldly equipment.}}{{#if:||{{#ifeq:{{{radiant}}}|yes| (radiant)}}}}{{#if:| (disabled{{#switch:{{{disabled}}}|y|yes=| since }})}}
  • {{#if:Skyrim:Ruin's Edge|{{#ifeq:|Skyrim:Ruin's Edge||}}}}{{#if:|Repeatable }}{{#ifeq:|yes
 |Required for Cadwell's Almanac }}{{#if:
 |[[File:|bottom|20px]]}}{{#if:|}}The Edge of RuinCC{{#if:Find a madwoman's legendary bow.|: Find a madwoman's legendary bow.}}{{#if:||{{#ifeq:{{{radiant}}}|yes| (radiant)}}}}{{#if:| (disabled{{#switch:{{{disabled}}}|y|yes=| since }})}}
  • {{#if:Skyrim:Alternative Armors - Ebony Plate|{{#ifeq:|Skyrim:Alternative Armors - Ebony Plate||}}}}{{#if:|Repeatable }}{{#ifeq:|yes
 |Required for Cadwell's Almanac }}{{#if:
 |[[File:|bottom|20px]]}}{{#if:|}}Heart of CrimsonCC{{#if:Confront the murderous leader of a bandit gang.|: Confront the murderous leader of a bandit gang.}}{{#if:||{{#ifeq:{{{radiant}}}|yes| (radiant)}}}}{{#if:| (disabled{{#switch:{{{disabled}}}|y|yes=| since }})}}
  • {{#if:Skyrim:Alternative Armors - Daedric Mail|{{#ifeq:|Skyrim:Alternative Armors - Daedric Mail||}}}}{{#if:|Repeatable }}{{#ifeq:|yes
 |Required for Cadwell's Almanac }}{{#if:
 |[[File:|bottom|20px]]}}{{#if:|}}Missing MerchantCC{{#if:A powerful set of armor has come on the market.|: A powerful set of armor has come on the market.}}{{#if:||{{#ifeq:{{{radiant}}}|yes| (radiant)}}}}{{#if:| (disabled{{#switch:{{{disabled}}}|y|yes=| since }})}}
  • {{#if:Skyrim:Pets of Skyrim|{{#ifeq:|Skyrim:Pets of Skyrim||}}}}{{#if:|Repeatable }}{{#ifeq:|yes
 |Required for Cadwell's Almanac }}{{#if:
 |[[File:|bottom|20px]]}}{{#if:|}}Pets of SkyrimCC{{#if:Find trained pets around Skyrim.|: Find trained pets around Skyrim.}}{{#if:||{{#ifeq:{{{radiant}}}|yes| (radiant)}}}}{{#if:| (disabled{{#switch:{{{disabled}}}|y|yes=| since }})}}
  • {{#if:Skyrim:Shadowrend|{{#ifeq:|Skyrim:Shadowrend||}}}}{{#if:|Repeatable }}{{#ifeq:|yes
 |Required for Cadwell's Almanac }}{{#if:
 |[[File:|bottom|20px]]}}{{#if:|}}Through a Glass, DarklyCC{{#if:Confront the darkness within yourself to obtain a powerful weapon.|: Confront the darkness within yourself to obtain a powerful weapon.}}{{#if:||{{#ifeq:{{{radiant}}}|yes| (radiant)}}}}{{#if:| (disabled{{#switch:{{{disabled}}}|y|yes=| since }})}}
  • {{#if:Skyrim:Alternative Armors - Dragonscale|{{#ifeq:|Skyrim:Alternative Armors - Dragonscale||}}}}{{#if:|Repeatable }}{{#ifeq:|yes
 |Required for Cadwell's Almanac }}{{#if:
 |[[File:|bottom|20px]]}}{{#if:|}}Tilted ScalesCC{{#if:Retrieve a set of ancient armor from an old warrior.|: Retrieve a set of ancient armor from an old warrior.}}{{#if:||{{#ifeq:{{{radiant}}}|yes| (radiant)}}}}{{#if:| (disabled{{#switch:{{{disabled}}}|y|yes=| since }})}}

Other[edit]

In addition, many miscellaneous quests, such as favors, are located in Eastmarch. They are listed here.

Notes[edit]

  • Eastmarch also appears in ESO.
  • The "march" part of "Eastmarch" implies a borderland (as in "Marches": a frontier or border area between two countries or territories; from a Latin origin word meaning "margin"), and can be pronounced as "march" or "mark".

{{#switch:|subgroup|child=|none=|#default=

}}